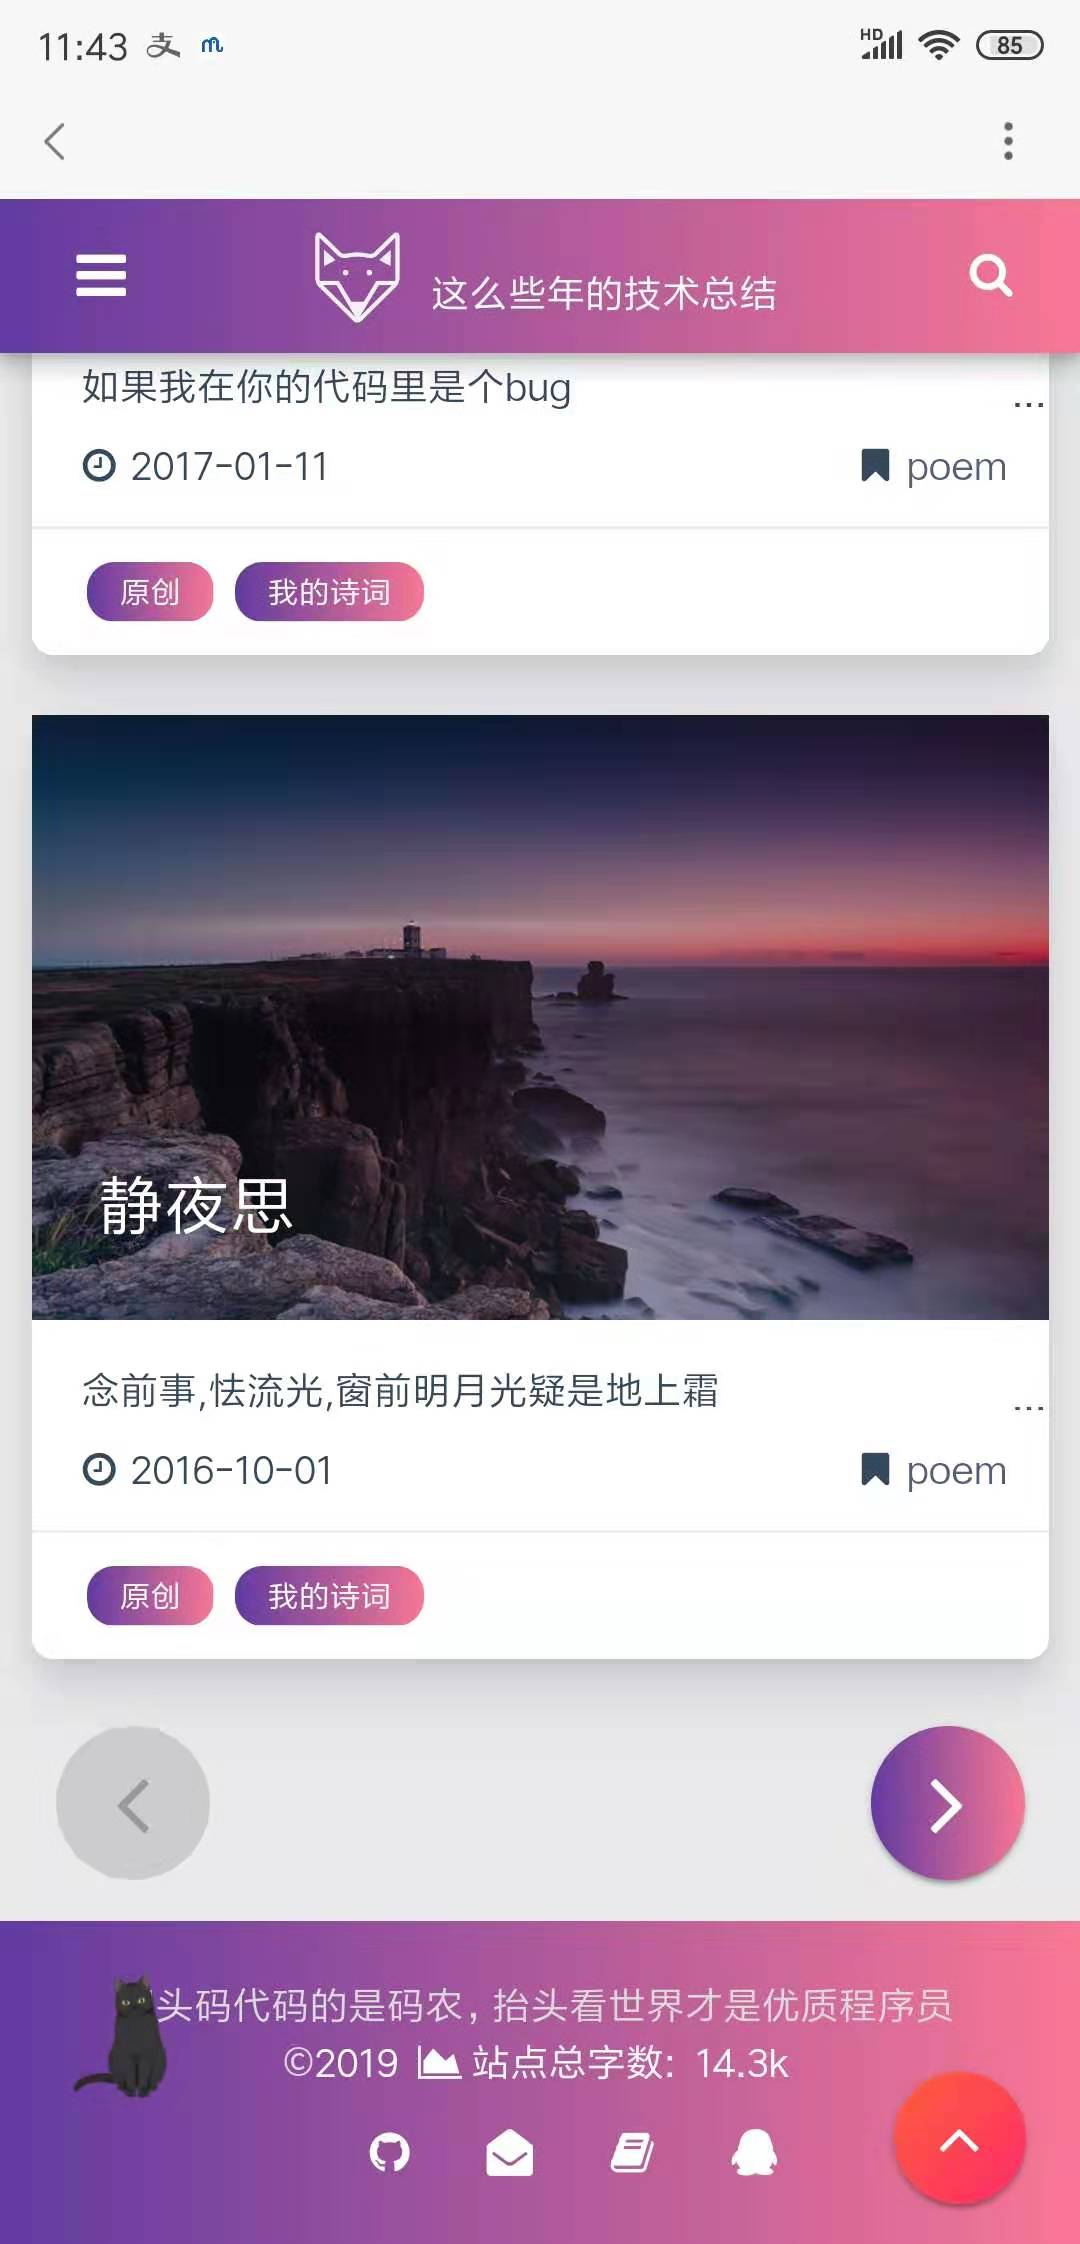
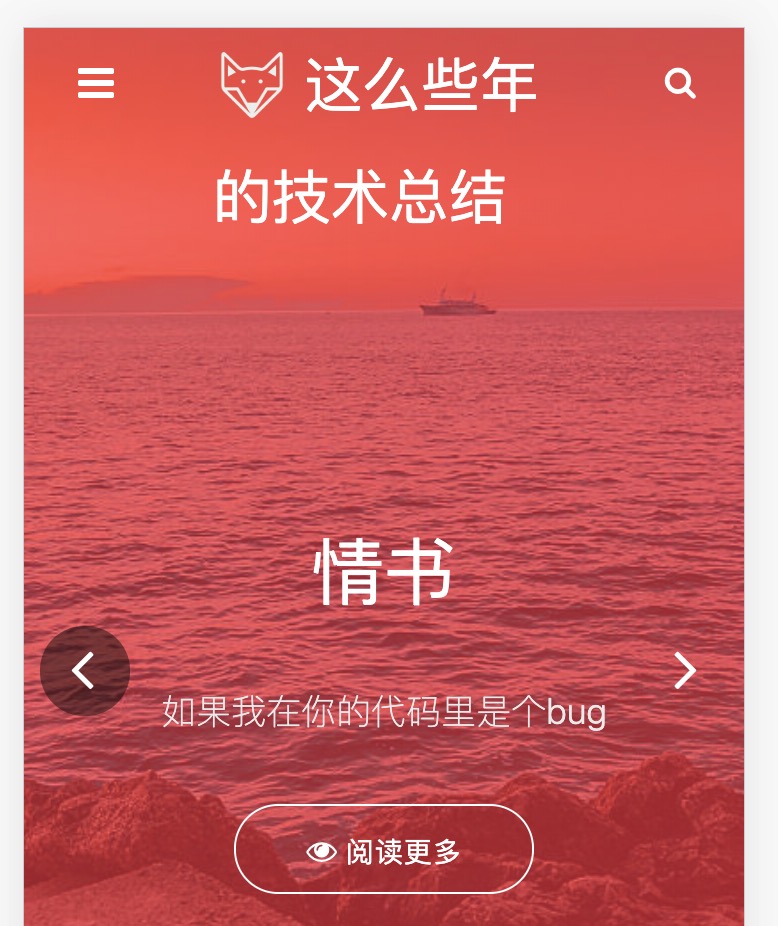
基于hexo-theme-matery做的个性化美化,仅代表个人审美,我们先来看几个效果截图
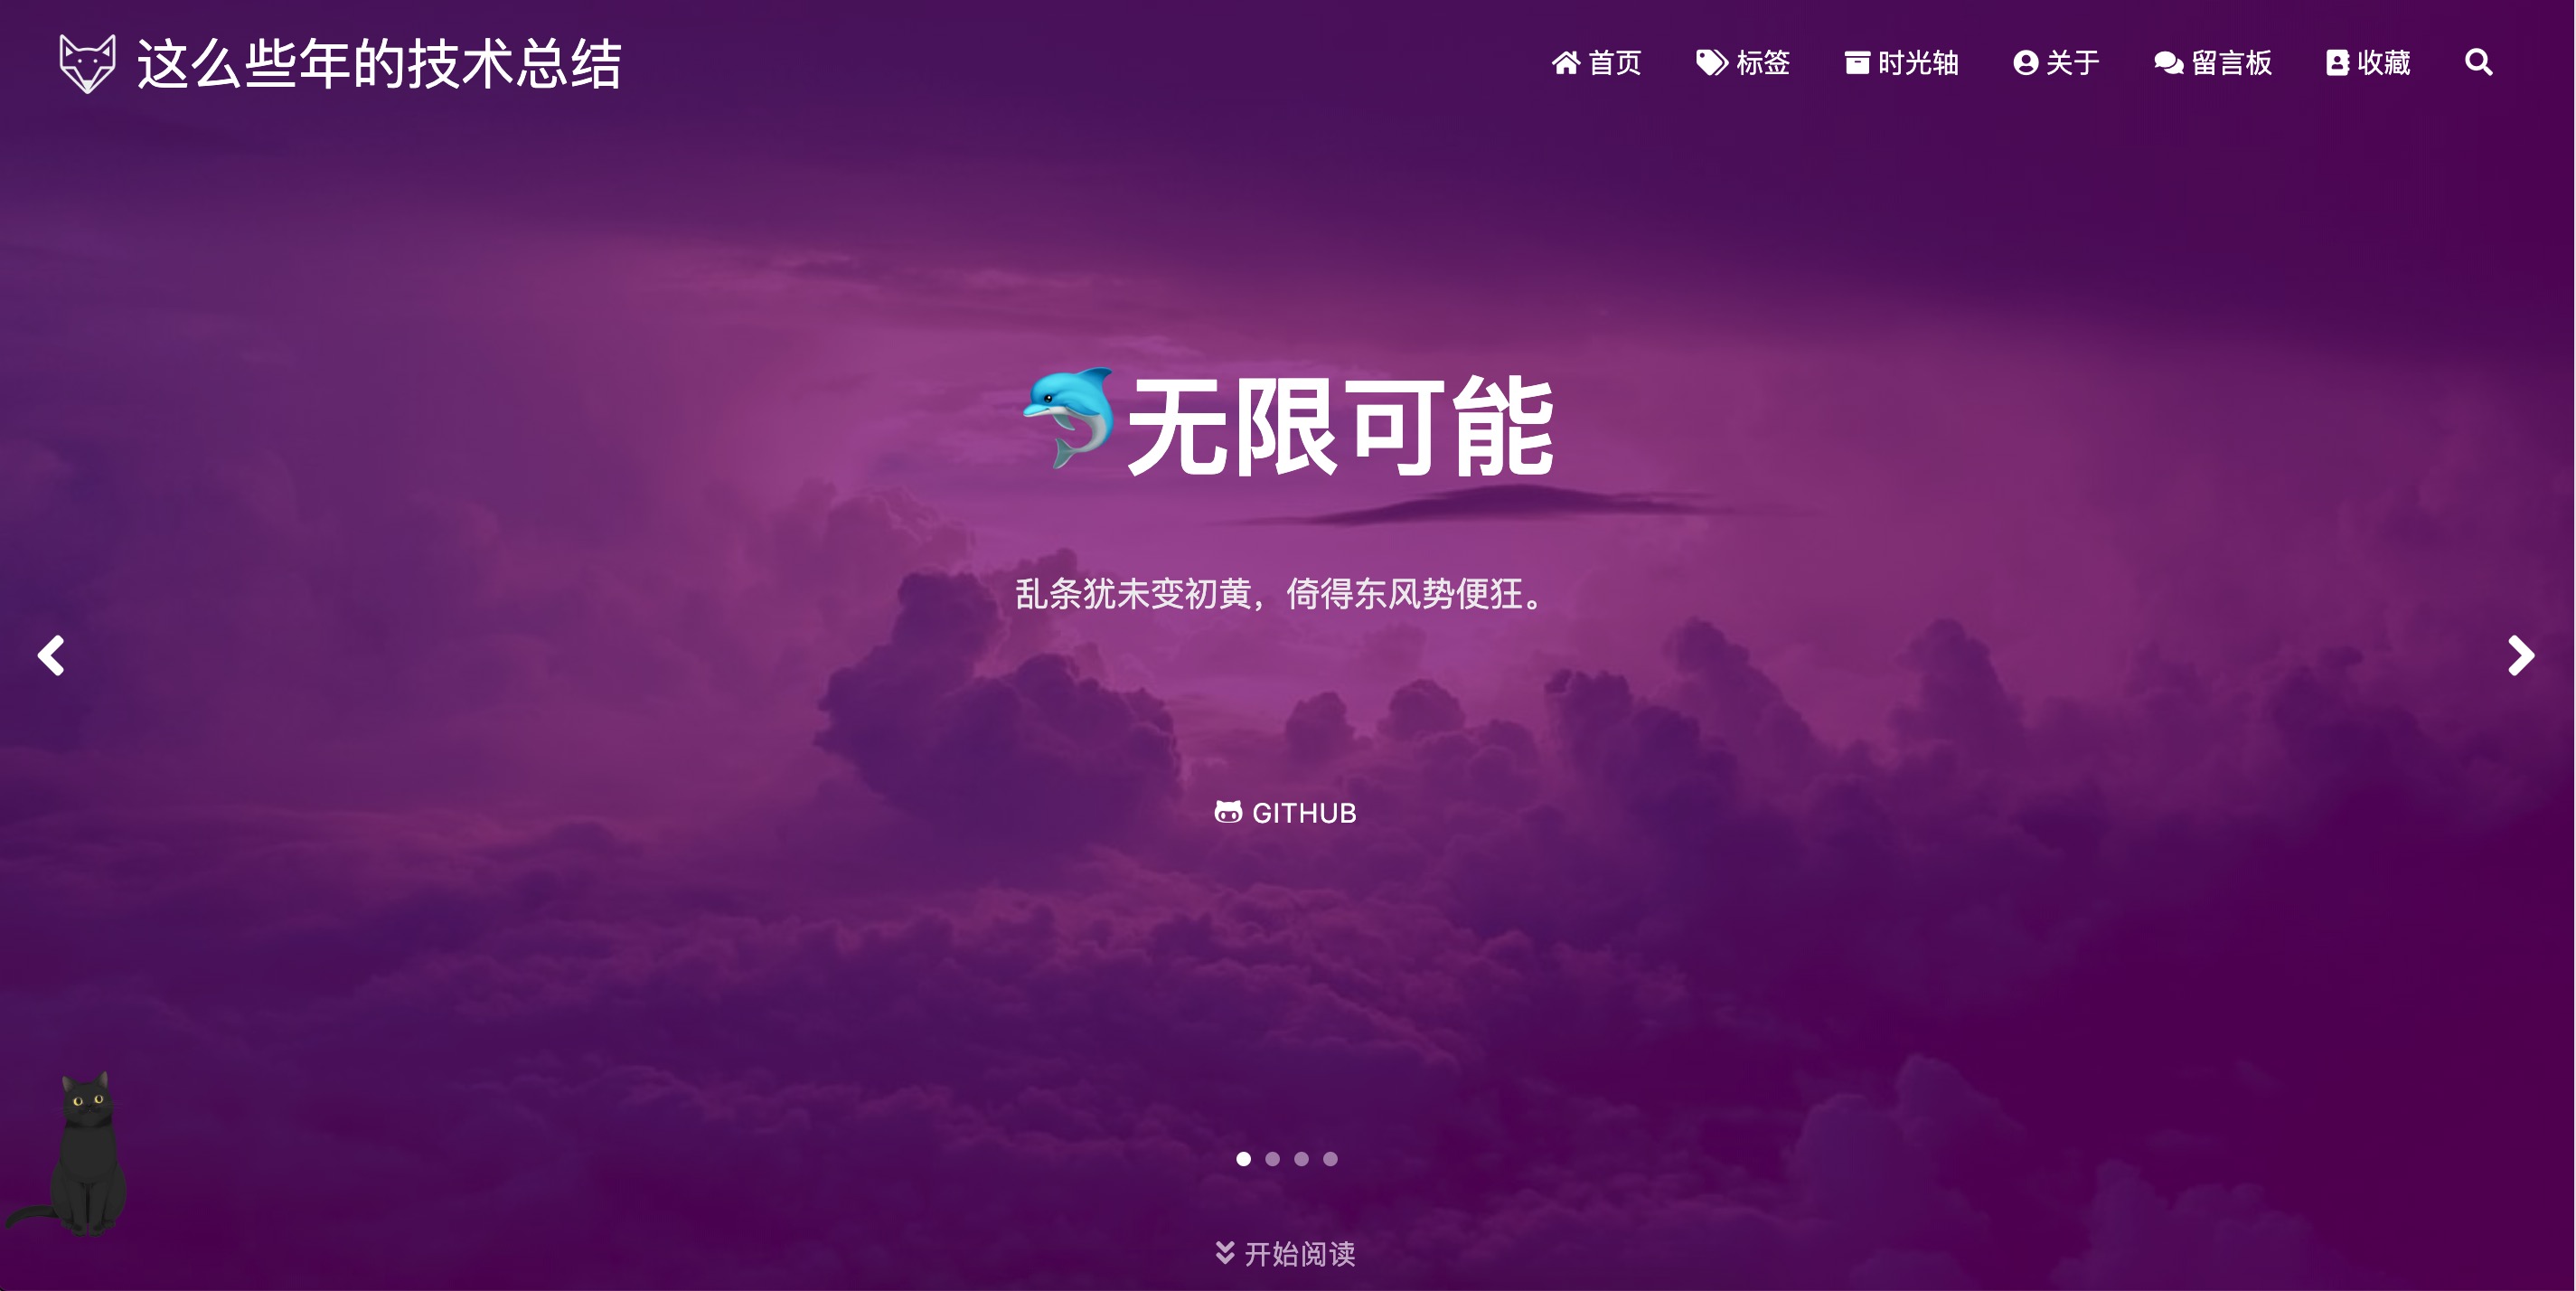
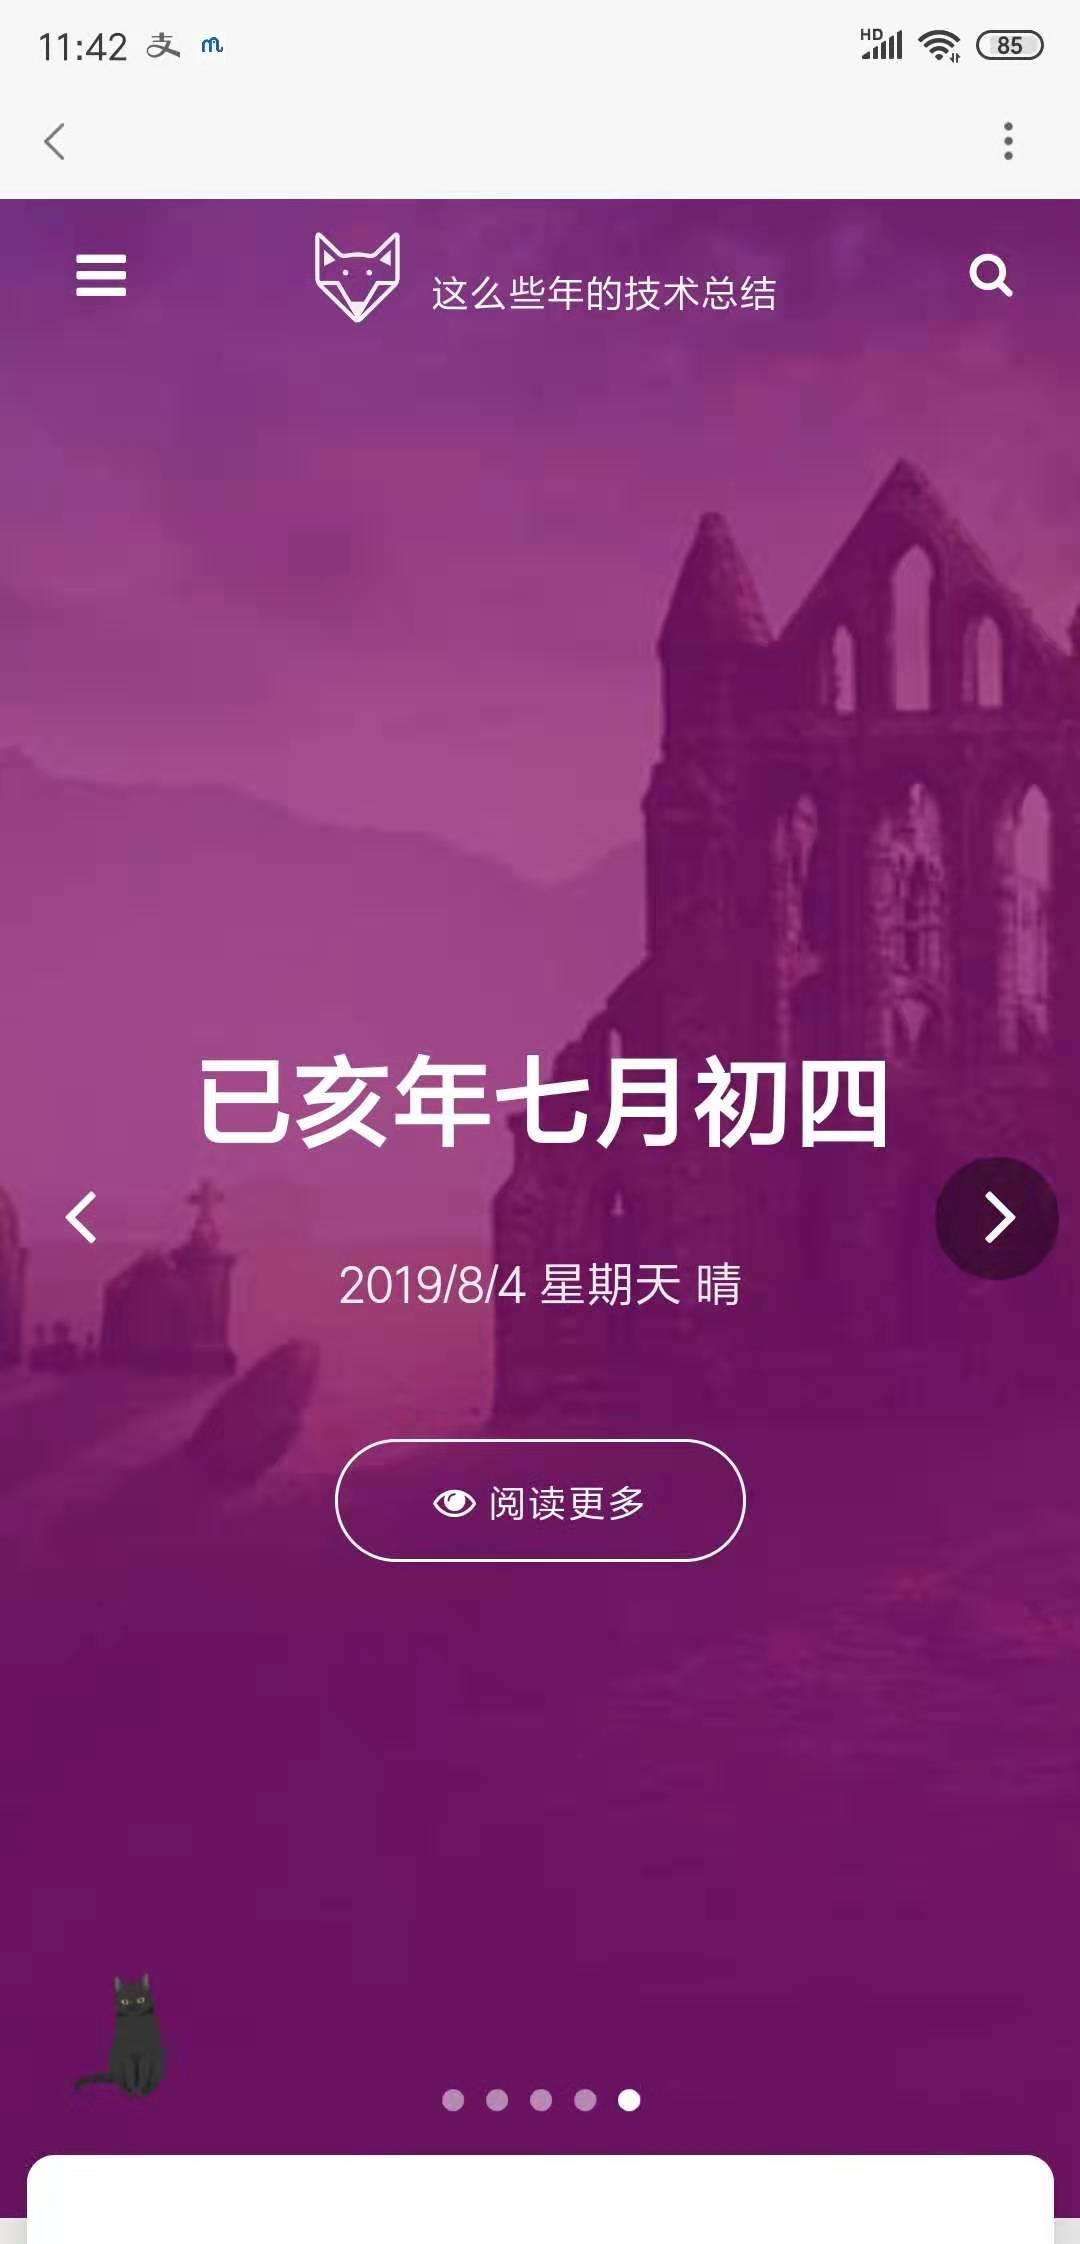
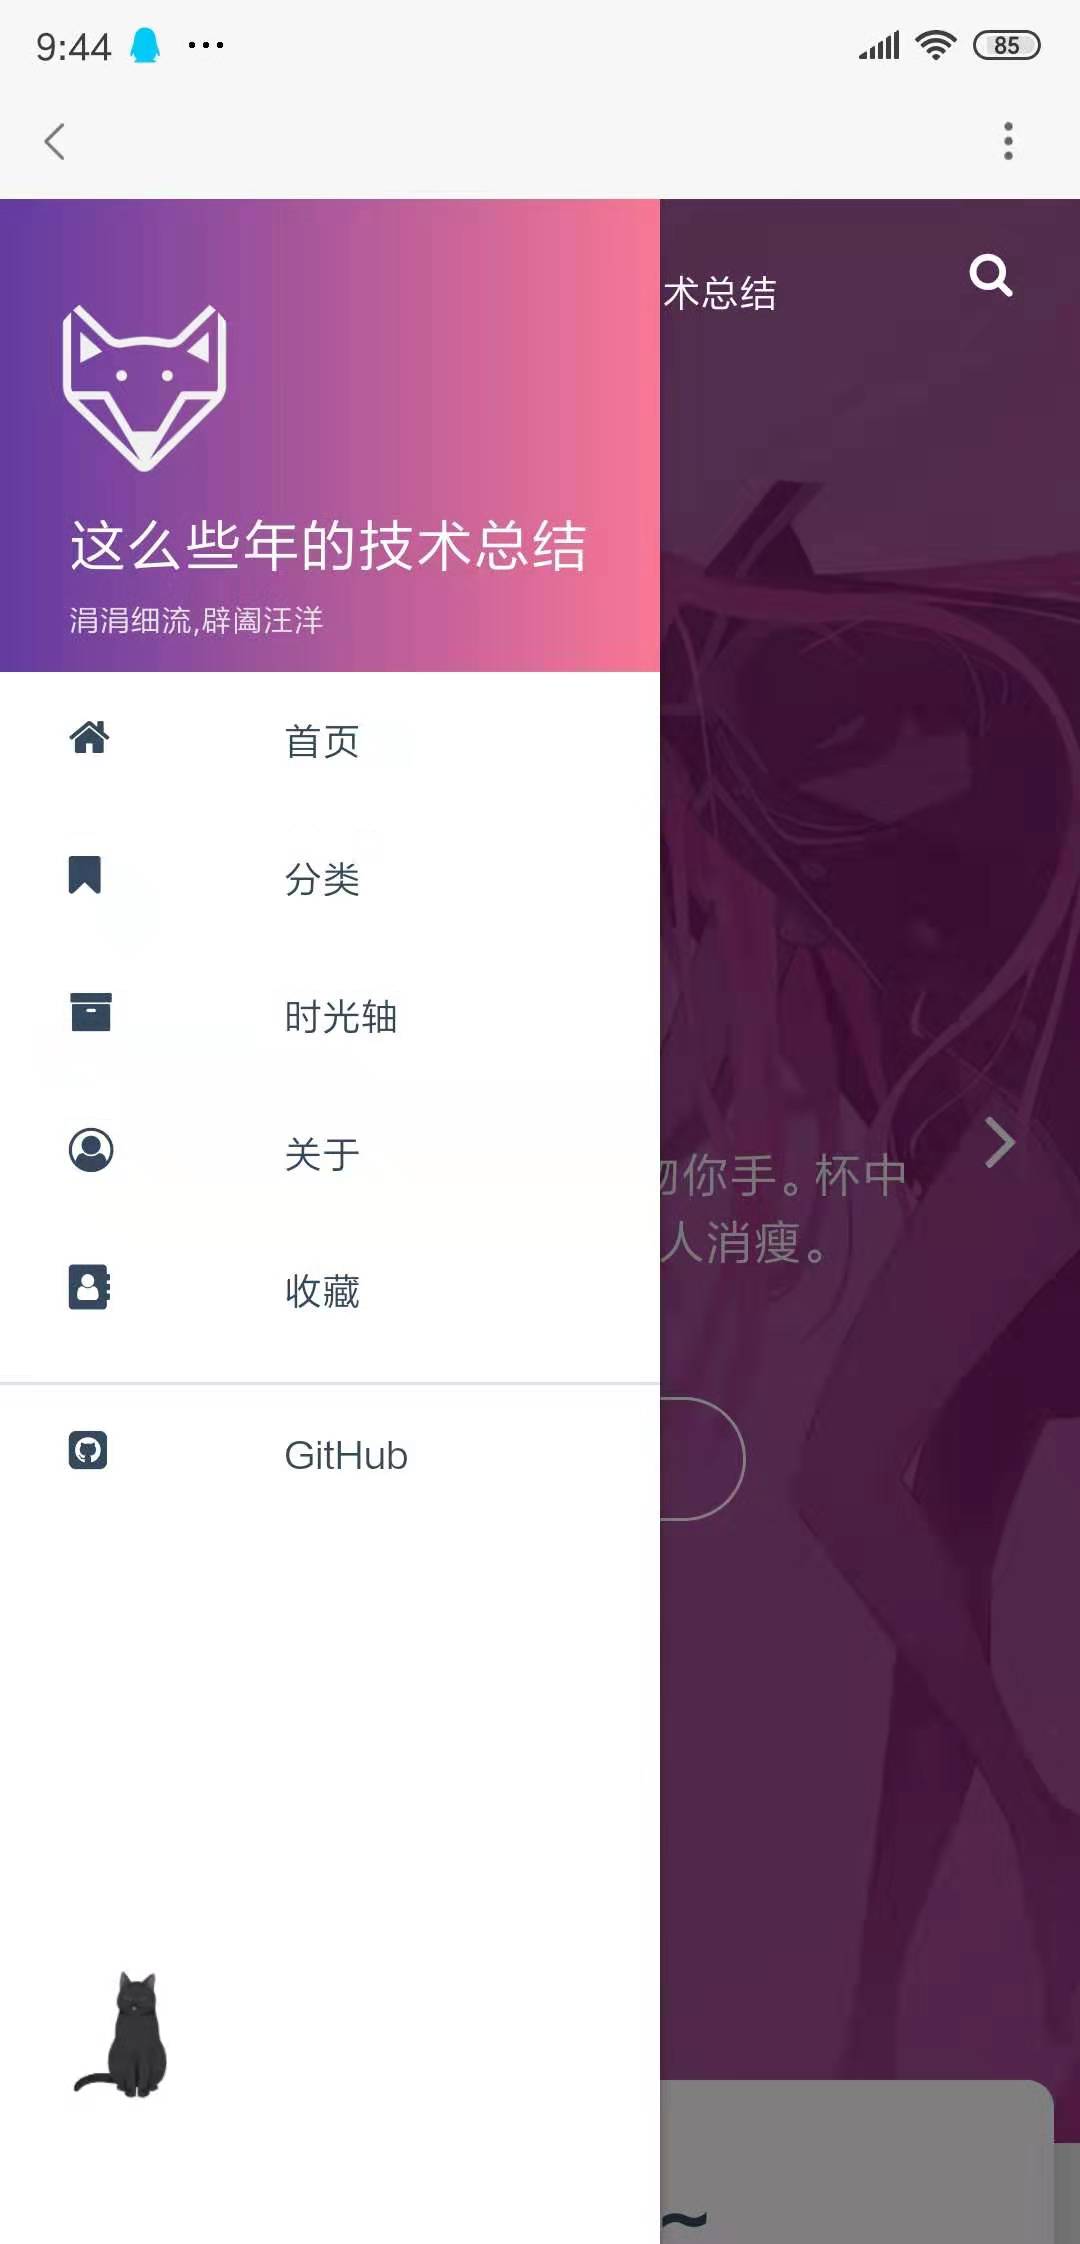
页面配色
修改顶部导航栏颜色,底部状态栏颜色,顶部导航栏右上角github图标颜色
hexo-theme-matery原来主题Banner头图都是偏紫色系,因此个人觉得原来主题顶部和底部的绿色状态来显示的很突兀.对比如下:


查找方法基本就是打开chrome浏览器的检查,选择想要查看的页面元素,然后看他的Style文件,找到关键词之后去hexo-theme-matery主题的css文件中查找后修改即可,这个基本没什么难度。
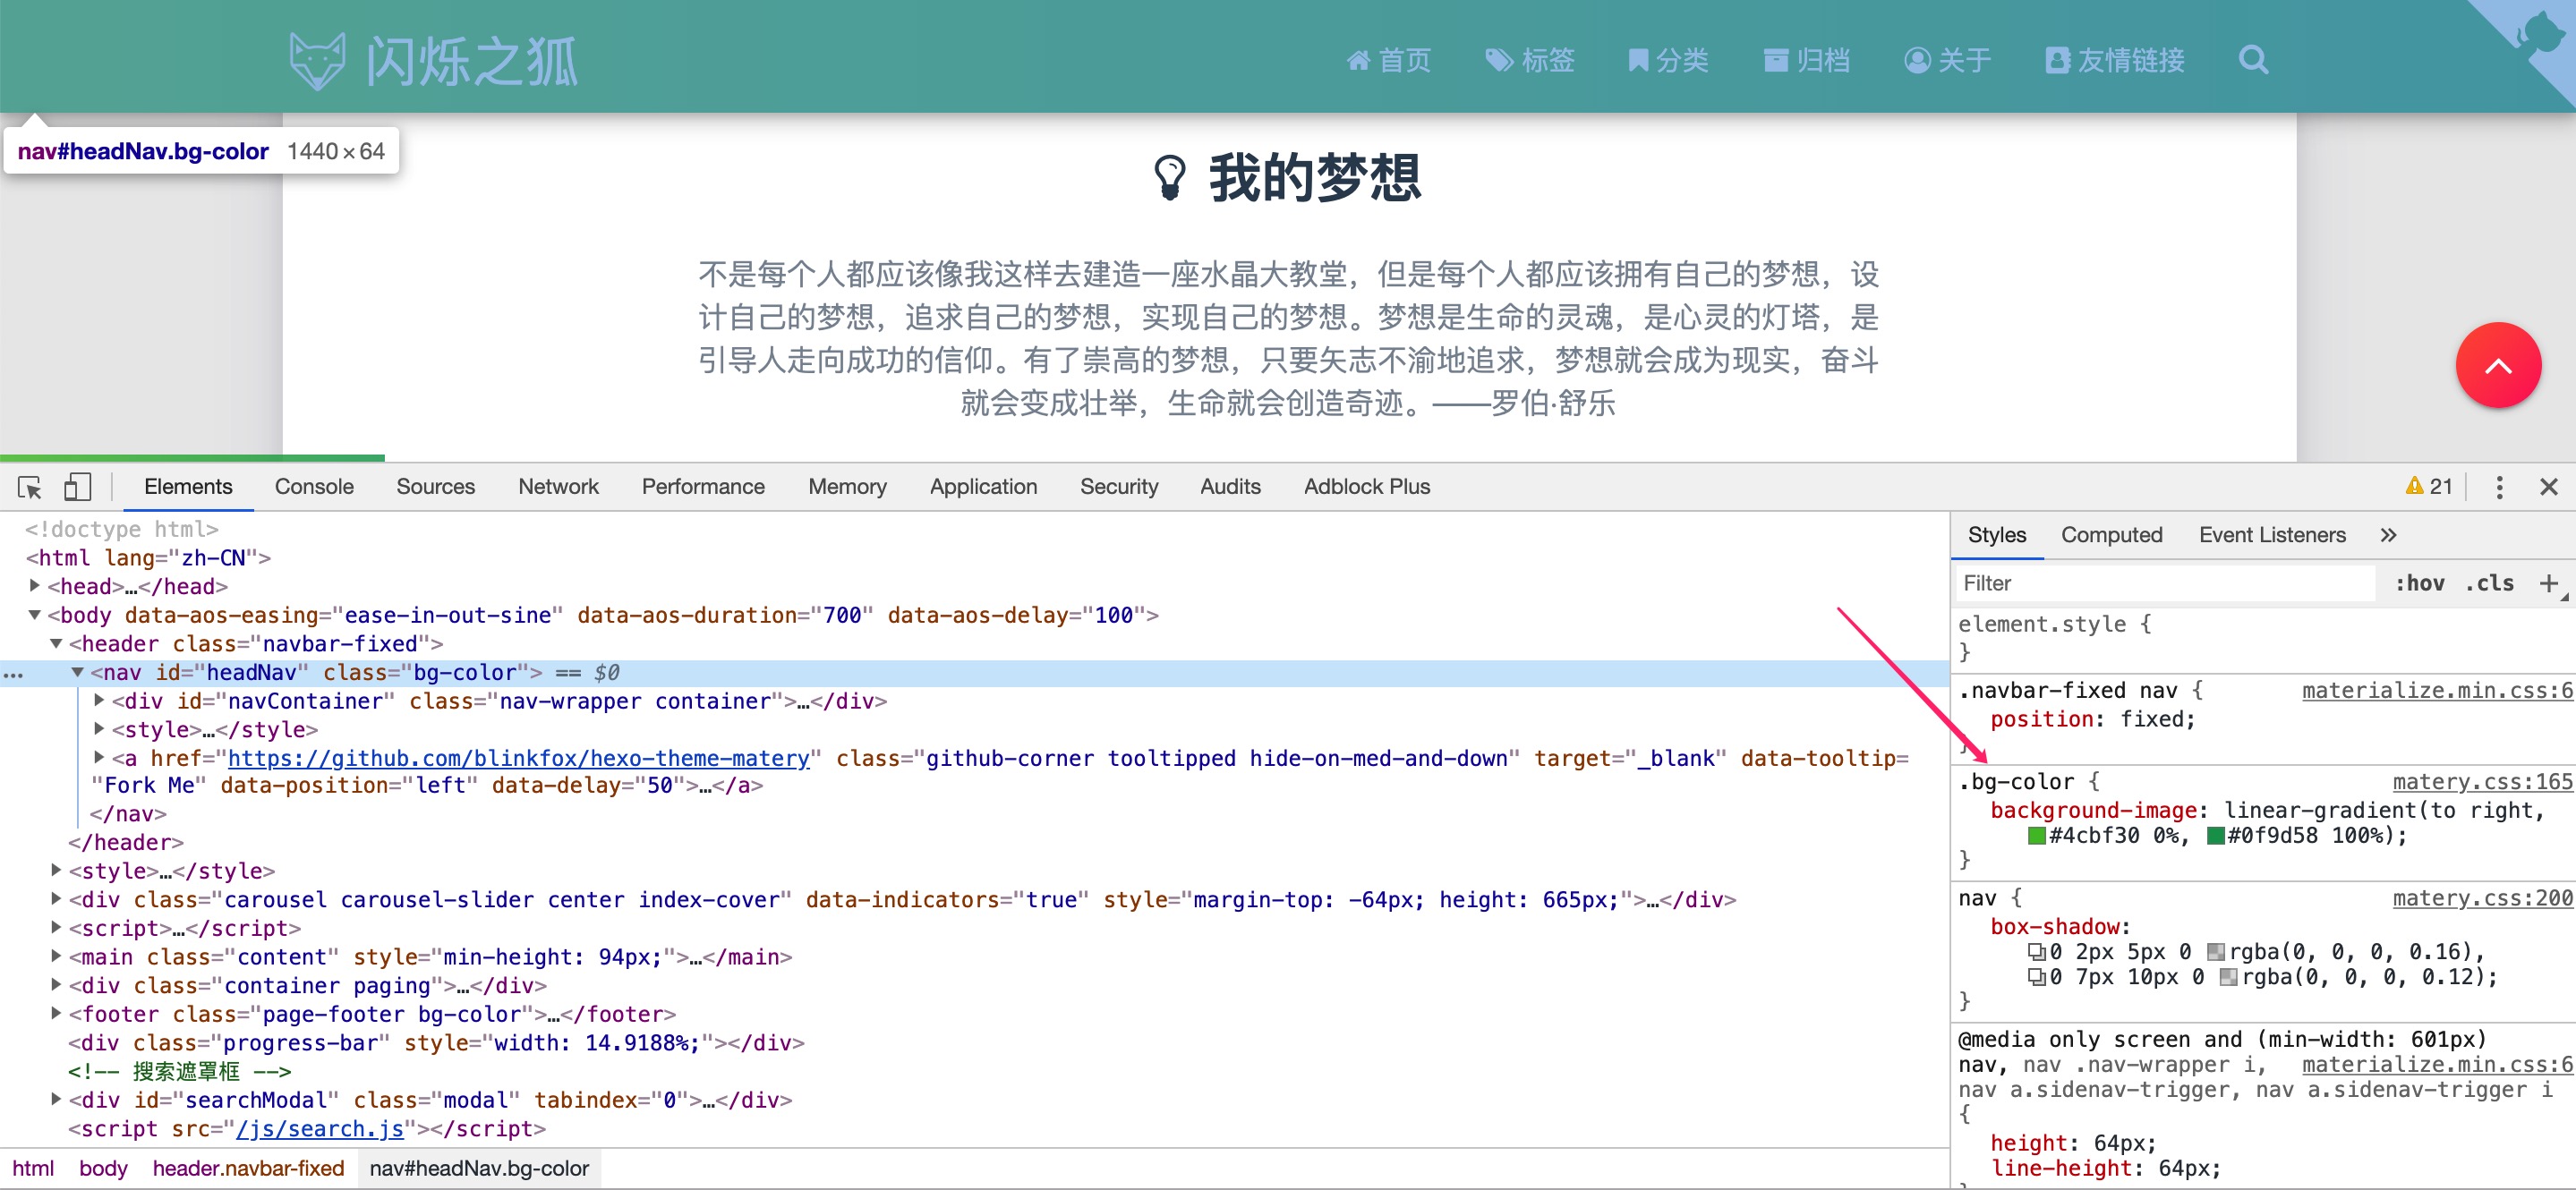
打开 matery/source/css/matery.css 文件 搜索 .bg-color 大概在198行
修改background-image属性中linear-gradient内的值即可改成你自己想要的颜色
.bg-color {
  background-image: linear-gradient(to right,#623AA2 0%,#F97794 100%);
}
之后顶部导航栏颜色,底部状态栏颜色都会改变了
然后是github右上角的角标。这个通过浏览器搜索可以定位到标签,但在 matery.css 内却找不到关于颜色的标签控制器。因此推断,这个地方的颜色控制没有写在该文件中,理由是因为这个是个性化的配置,而matery.csw这个文件主打的是全局配置,一般多个地方都会用到的样式才会写到这里,因此需要去读源码了。我们先看看 layout中
$ ls
_partial       about.ejs      categories.ejs friends.ejs    gallery.ejs    layout.ejs     tag.ejs
_widget        archive.ejs    category.ejs   galleries.ejs  index.ejs      post.ejs       tags.ejs
貌似没有相关的,再看看 _partial 目录下
$ ls
back-top.ejs           gitalk.ejs             header.ejs             paging.ejs             prev-next.ejs          social-link-simple.ejs
bg-cover-content.ejs   github-link.ejs        index-cover.ejs        post-cover.ejs         reprint-statement.ejs  social-link.ejs
bg-cover.ejs           gitment.ejs            livere.ejs             post-detail-toc.ejs    reward.ejs             valine.ejs
disqus.ejs             google-analytics.ejs   mobile-nav.ejs         post-detail.ejs        search.ejs
footer.ejs             head.ejs               navigation.ejs         post-statis.ejs        share.ejs
有一个与github相关的 github-link.ejs,打开查看发现原来配置就在这里,第15行左右
.github-corner svg {
    color: #F062A7;
    fill: #fff;
    height: 64px;
    width: 64px;
}
我们修改 color 的属性值就可以随心所欲的改变github角标的颜色。
主题中跳转连接都指向自己的github
这个在主题的配置文件中
# Whether to display fork me on github icon and link, default true, You can change it to your repo address
 # 配置是否在 header 中显示 fork me on github 的图标,默认为true,你可以修改为你的仓库地址.
 githubLink:
   enable: true
网站底部还有一部分连接
-------------------------- layout/_partial/footer.ejs --------------------------
index 8b051a7..1630d35 100755
@@ -1,12 +1,7 @@
<footer class="page-footer bg-color">
<div class="container row center-align">
<div class="col s12 m8 l8 copy-right">
- Copyright ©
- <span id="year">年份</span>
- <a href="<%- config.url %>" target="_blank"><%- config.author %></a>
- | Powered by <a href="https://hexo.io/" target="_blank">Hexo</a>
- | Theme <a href="https://github.com/blinkfox/hexo-theme-matery" target="_blank">Matery</a>
- <br>
+ ©<span id="year">2019</span>
<% if (theme.wordCount.totalCount) { %>
<i class="fas fa-chart-area"></i> 站点总字数: <span
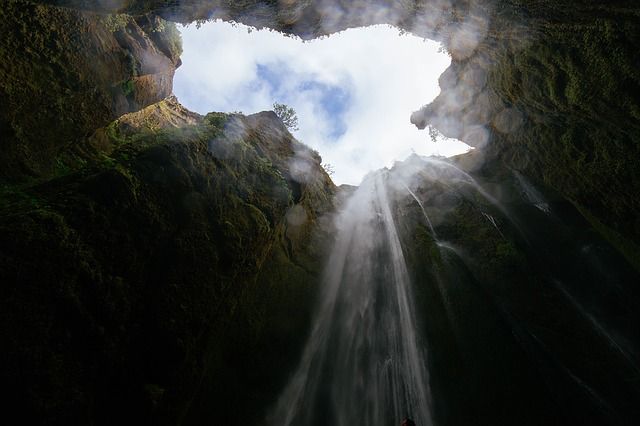
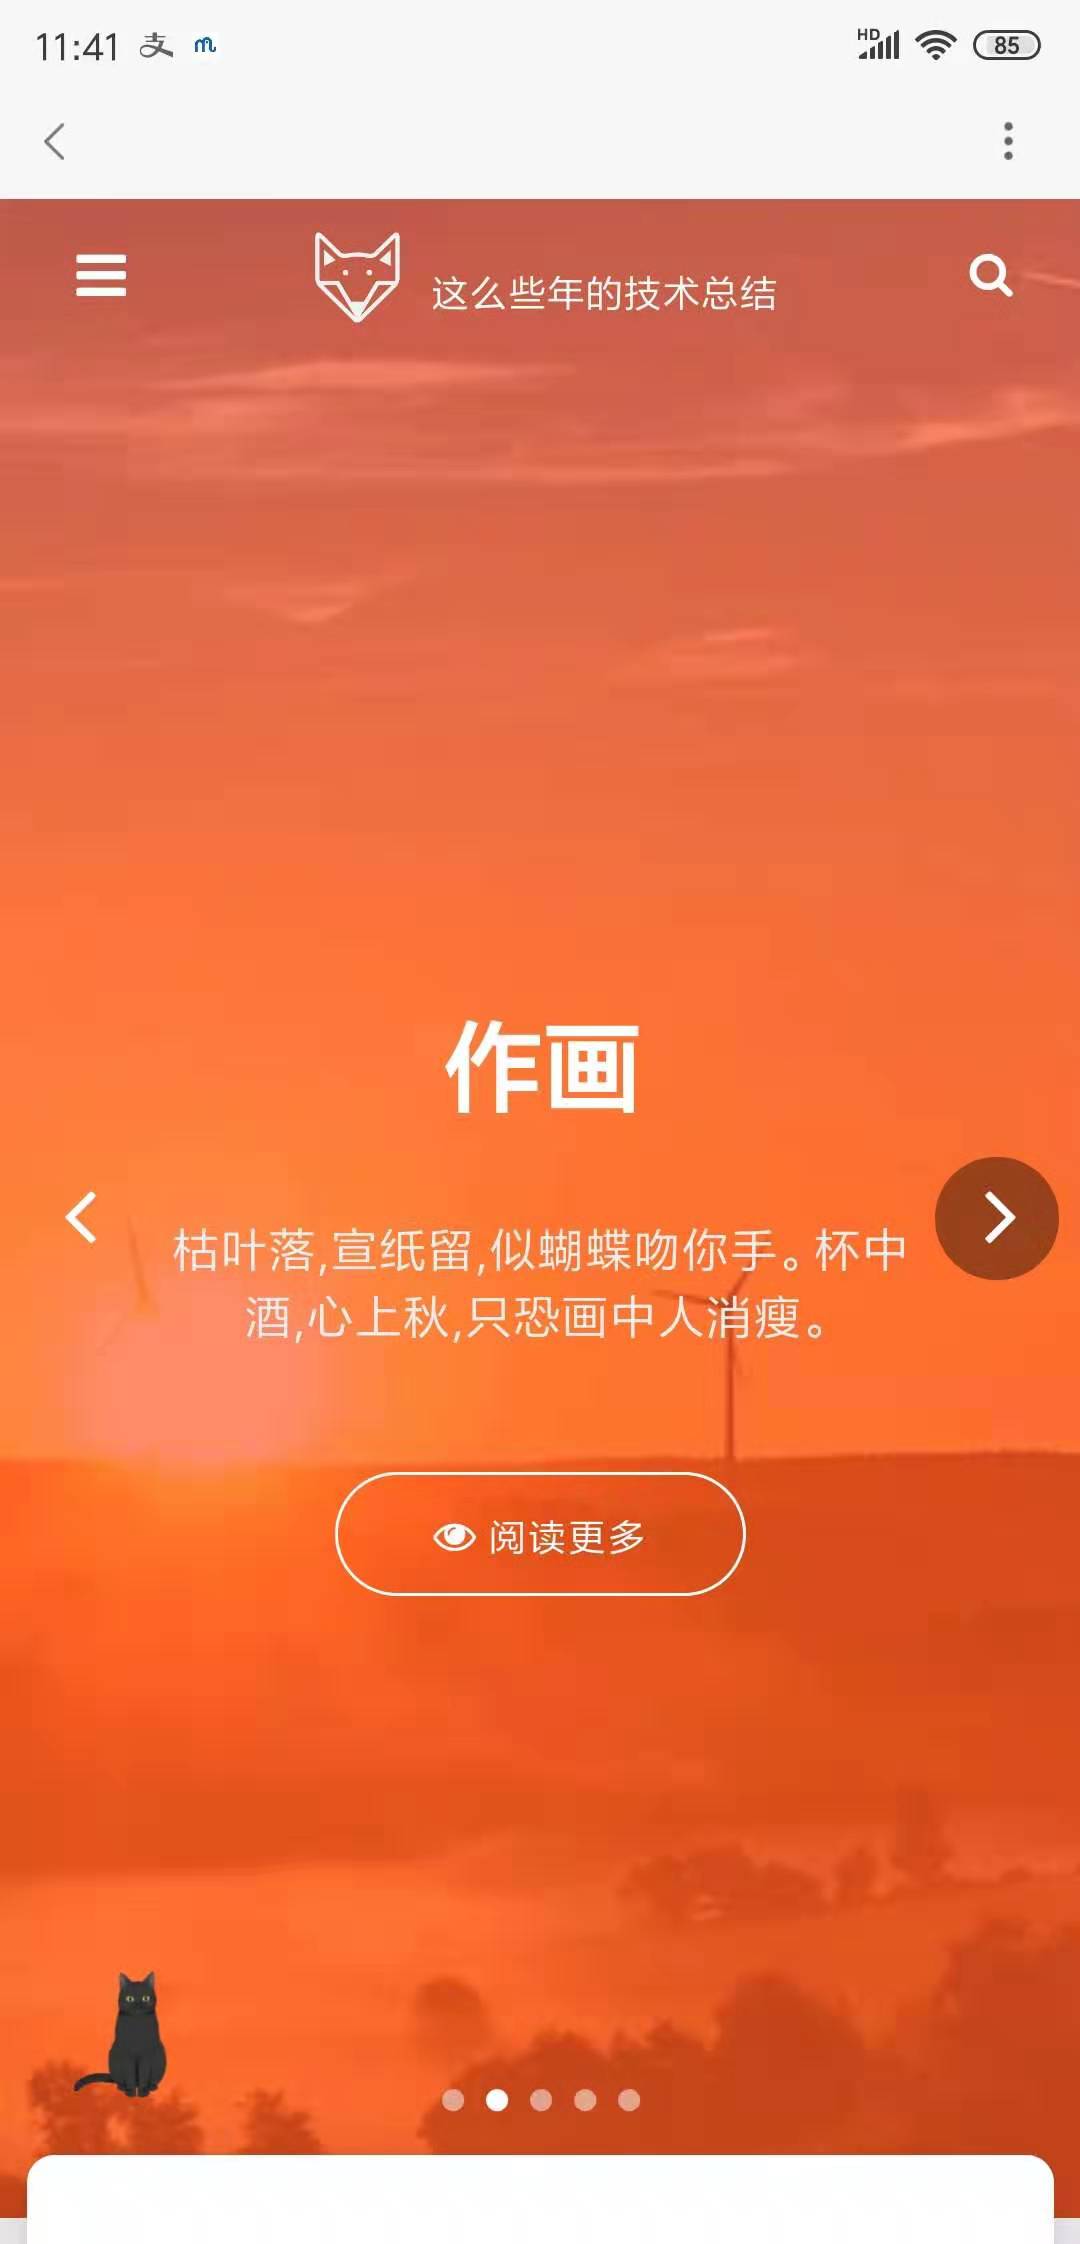
class="white-color"><%= totalcount(site) %></span> 字背景图、头图、轮播图、头像、站点图标都替换成自己喜欢的
这个在themes/matery/source/medias目录下面,找到图标替换成同名的即可。
轮播图的位置在 themes/matery/source/medias/banner 只用放七张就好,代码逻辑是每天换一
去掉wordcloud功能
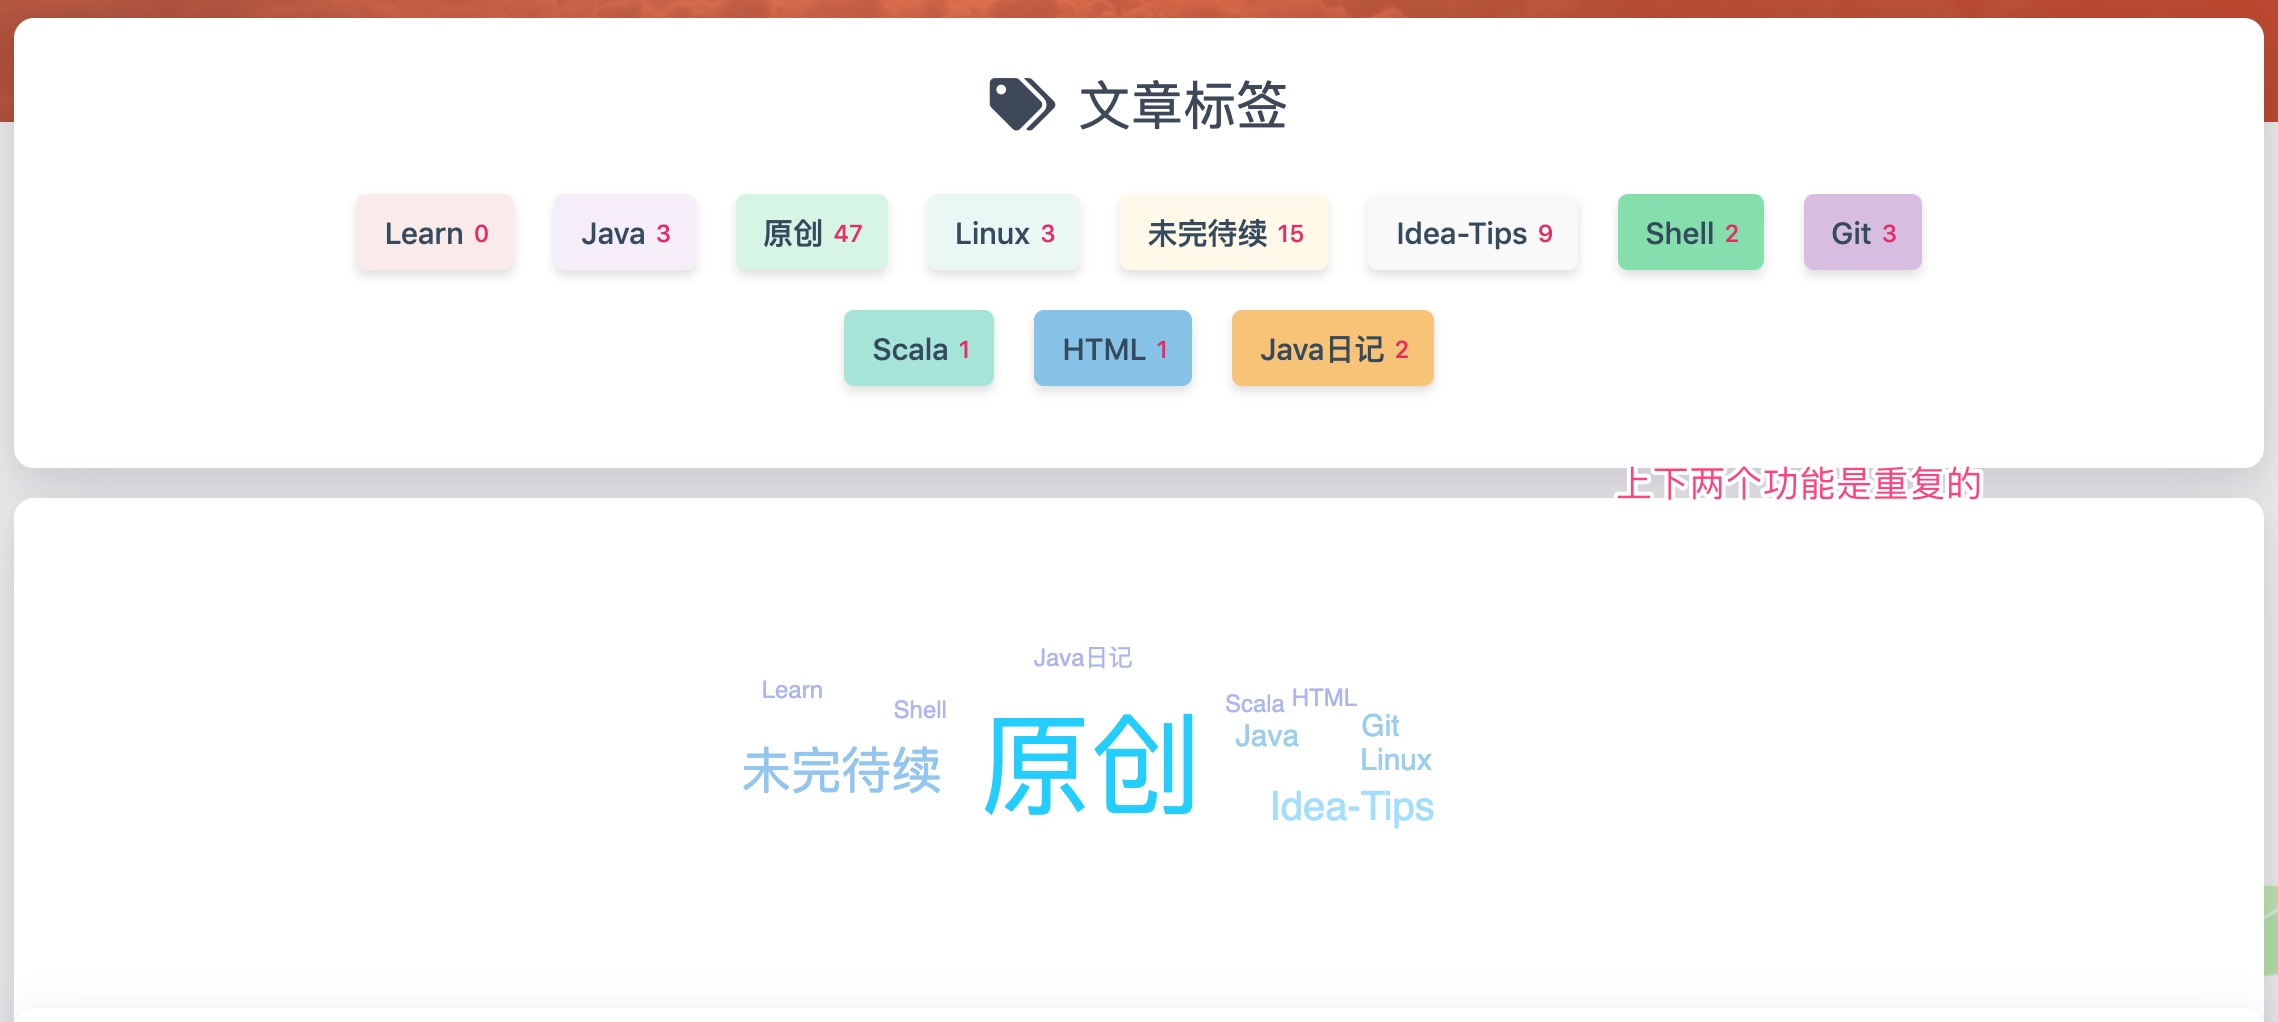
修改 layout/tags.ejs 内容为如下代码
<%- partial('_partial/bg-cover') %>
<main class="content">
<%- partial('_widget/category-cloud') %>
<% if (site.tags && site.tags.length > 0) { %>
<%- partial('_widget/tag-wordcloud') %>
<% } %>
<!--
<%- partial('_widget/tag-cloud') %>
<% if (site.categories && site.categories.length > 0) { %>
<%- partial('_widget/category-radar') %>
<% } %>
-->
<%- partial('_widget/post-charts') %>
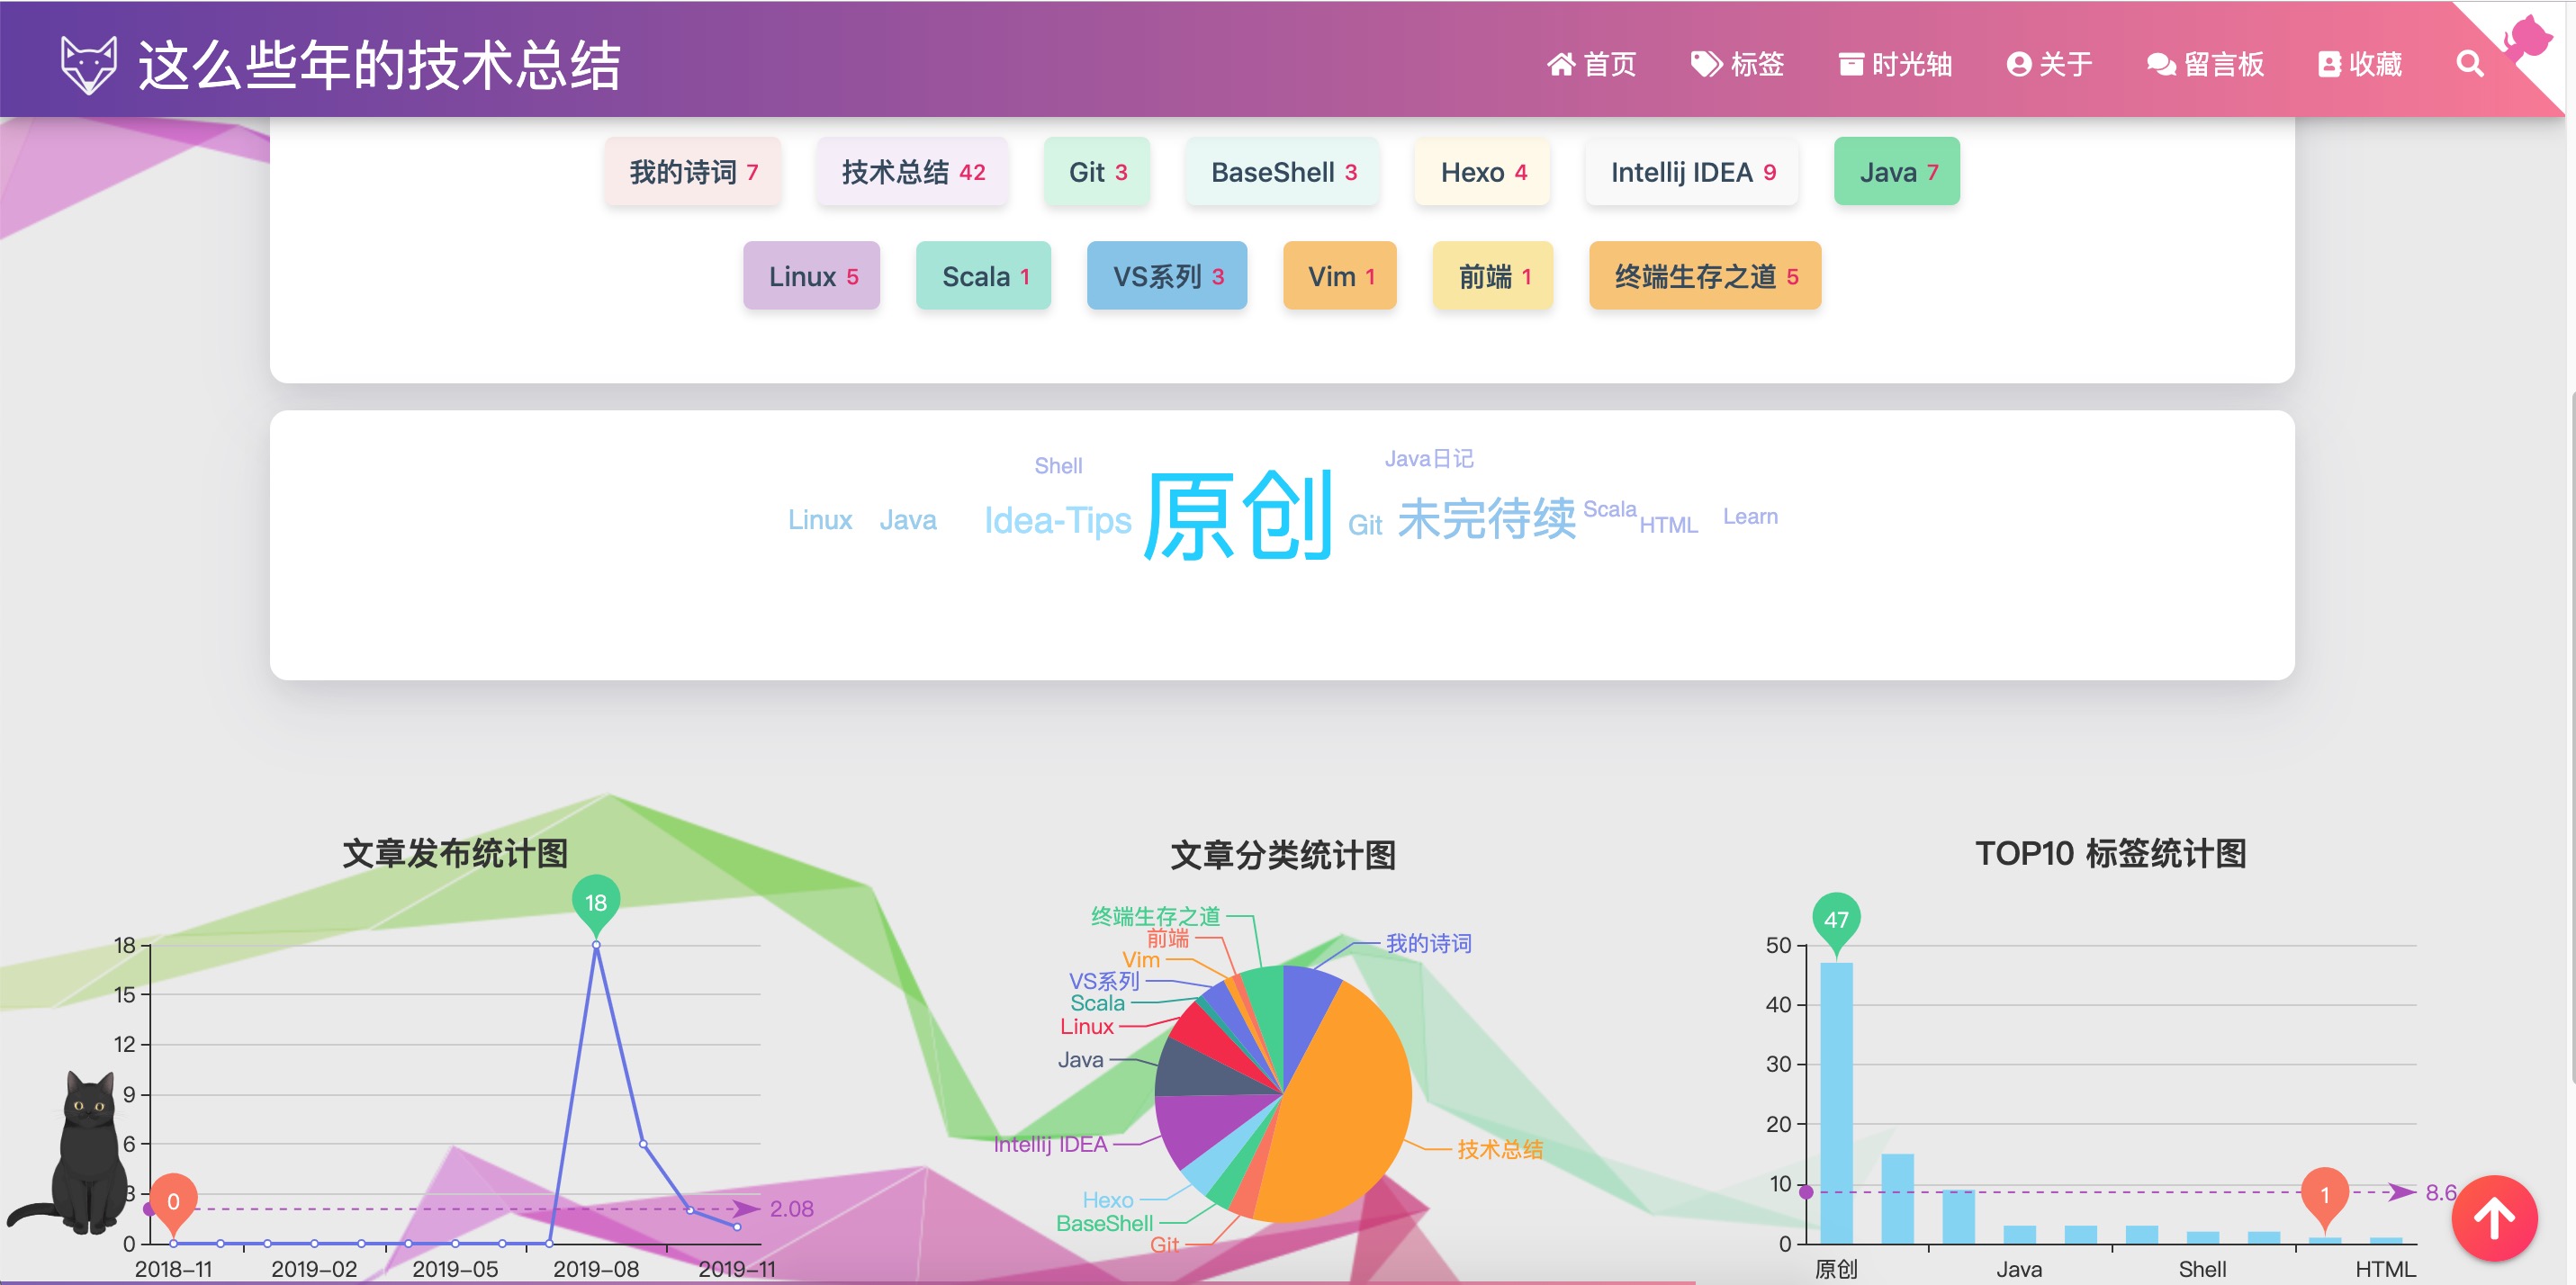
</main>其目的是把标签、分类两个页面合二唯一,将所有关于文件分类统计的内容都放到标签页面,这样可以省出一个标签的位置来,顶部导航栏也不会太拥挤,效果如下
添加百度统计
添加百度统计可以看到自己网站的访问情况等等
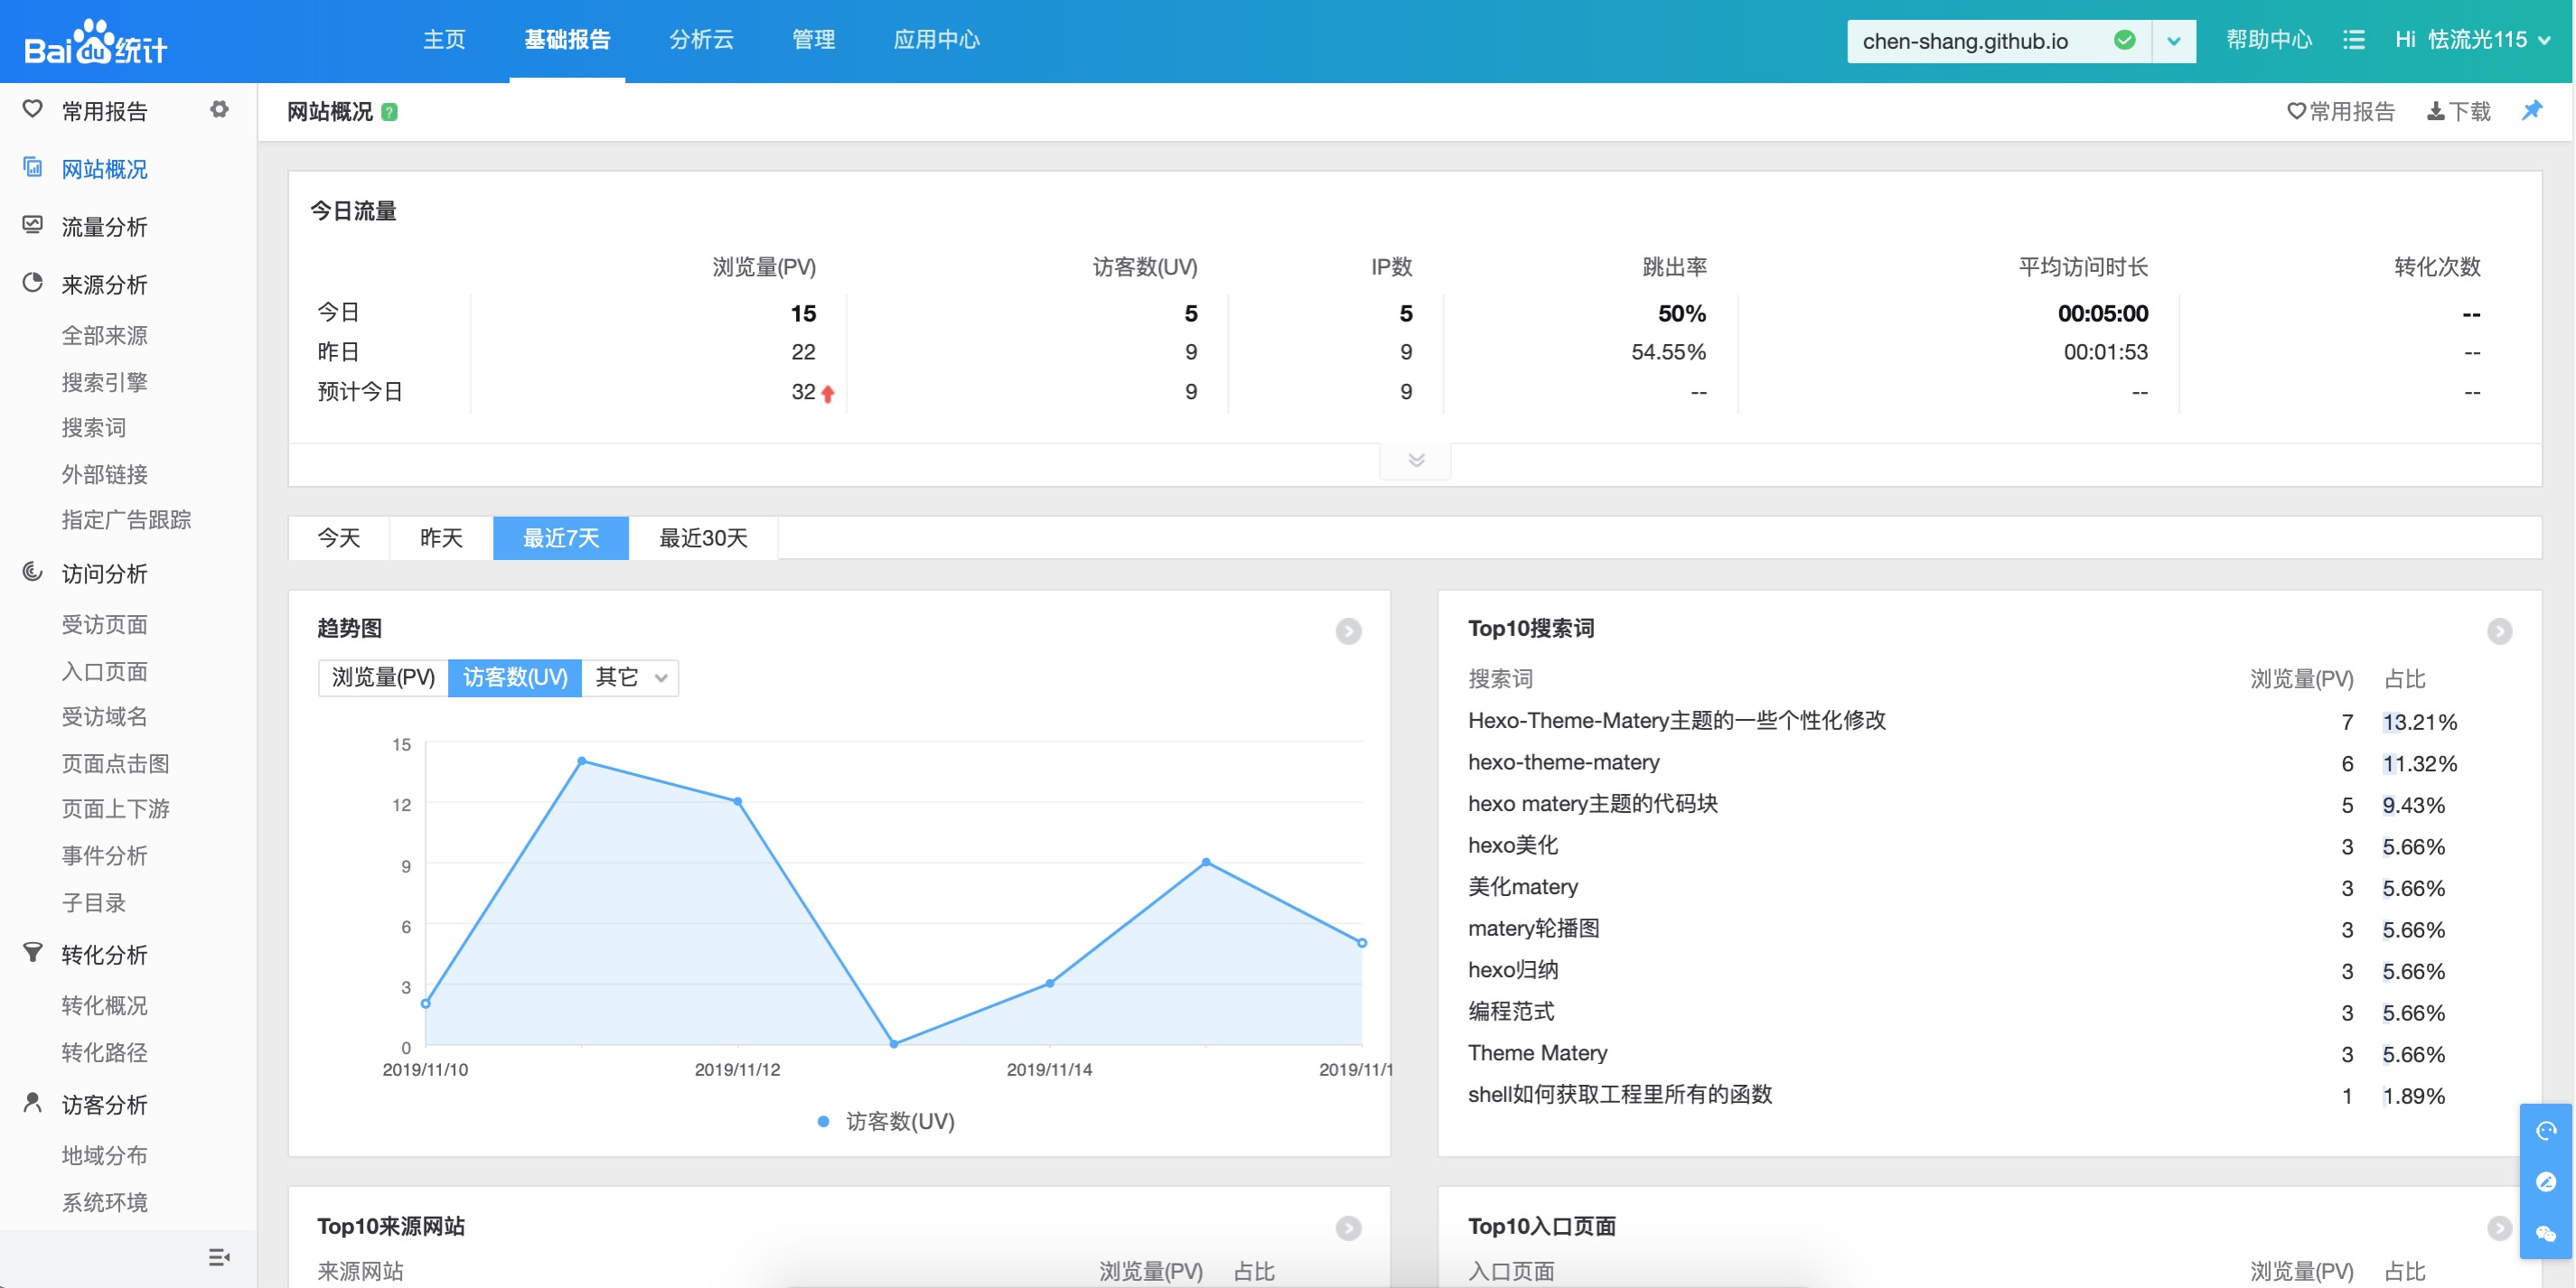
先去注册个百度统计账号,然后管理-代码管理里面可以看到安装方法
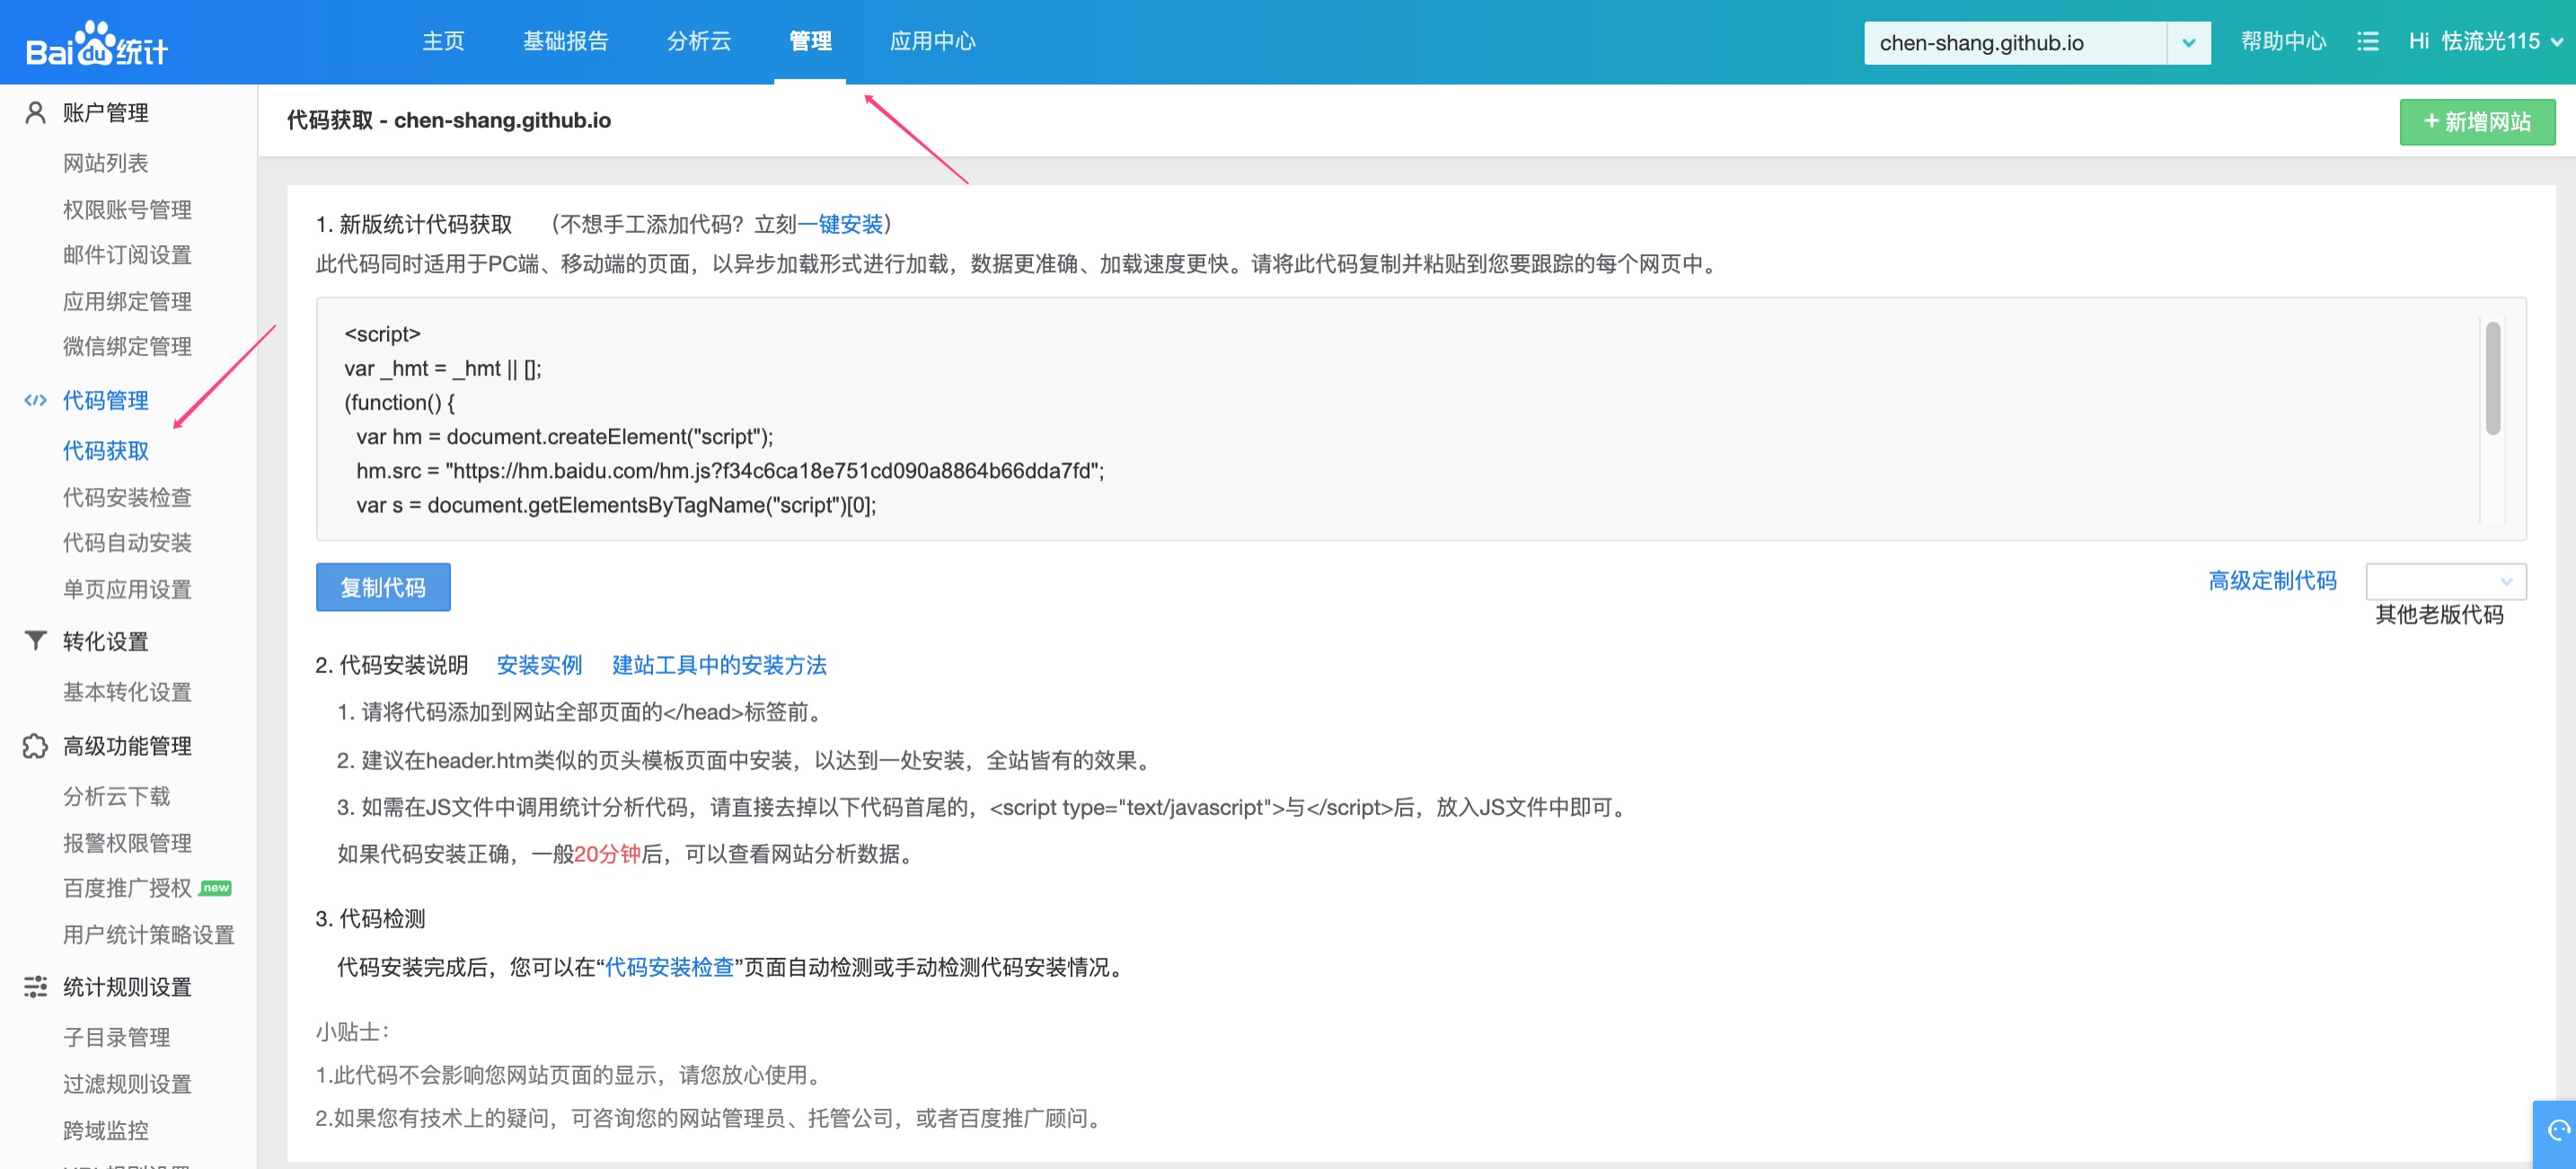
同时在底部添加一个超链接可以直接连接到百度云统计,这样很方便的可以查看自己网站的访问情况

自适应屏幕的时候字体大小
修改matery/source/css/matery.css,这样在手机等小屏幕上显示的字体大小就正常了,否则会因为标题字太长导致换行
---------------------------- source/css/matery.css ----------------------------
/*全局基础样式*/
/*小屏幕下(手机类)的样式*/
@media only screen and (max-width: 601px) {
.container {
width: 95%;
}
header .brand-logo .logo-span {
font-size: 1rem;
}
.bg-cover .title {
font-size: 3rem;
font-weight: 700;
line-height: 1.85em;
margin-bottom: 20px;
position: relative;
}
}
/*中等屏幕下(平板类)的样式*/
@media only screen and (min-width: 600px) and (max-width: 992px) {
.container {
width: 90%;
}
header .brand-logo .logo-span {
font-size: 2rem;
}
.bg-cover .title {
font-size: 4rem;
font-weight: 700;
line-height: 1.85em;
margin-bottom: 20px;
position: relative;
}
}
/*大屏幕下(桌面类)的样式*/
@media only screen and (min-width: 993px) {
.container {
width: 85%;
max-width: 1125px;
}
.post-container {
width: 90%;
margin: 0 auto;
max-width: 1250px;
}
header .brand-logo .logo-span {
font-size: 2rem;
}
.bg-cover .title {
font-size: 4rem;
font-weight: 700;
line-height: 1.85em;
margin-bottom: 20px;
position: relative;
}
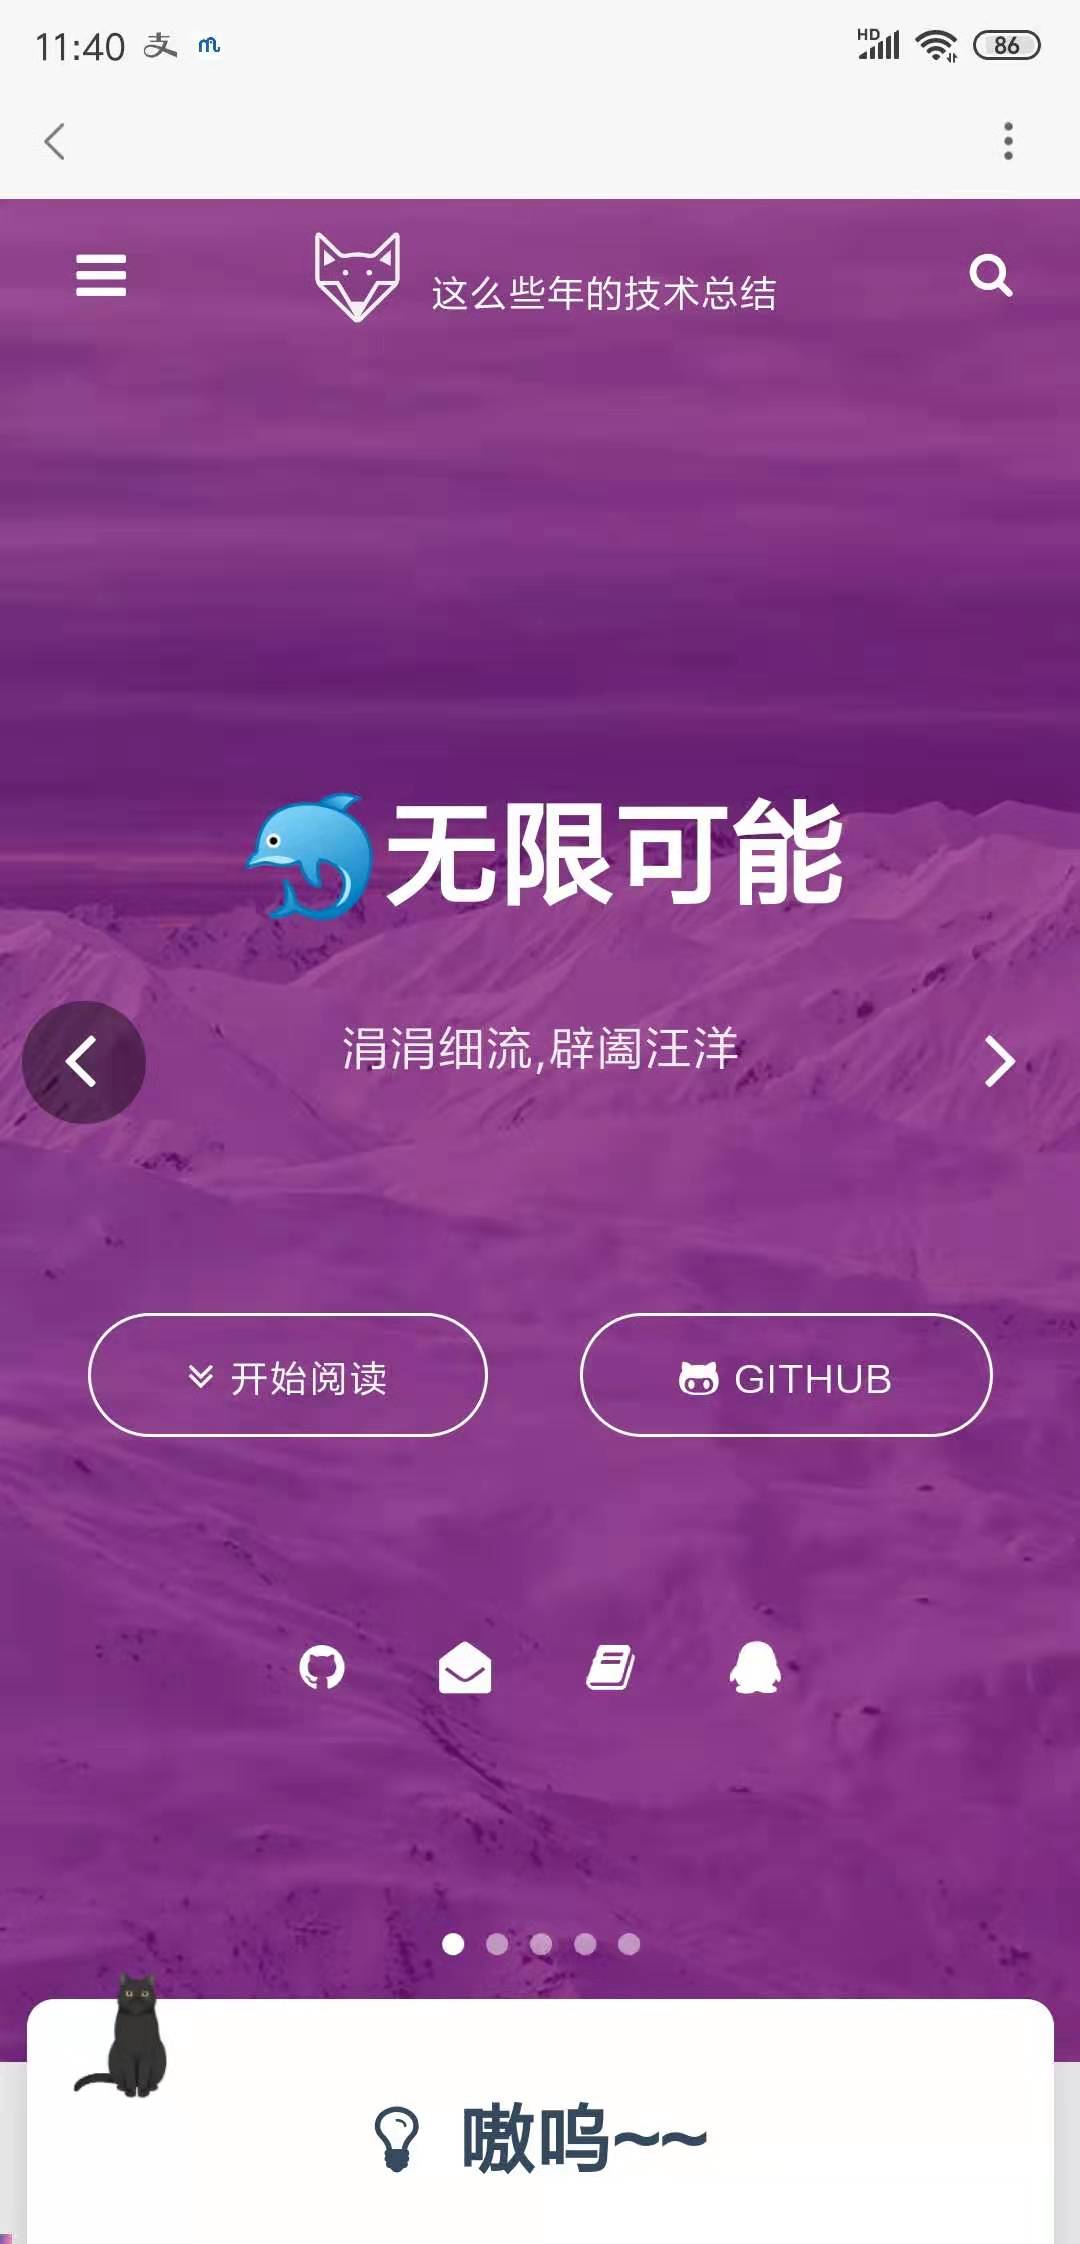
}每一一言
 上面 嗷呜 下的内容是动态生成的,增加网站的趣味性
--------------------------- layout/_widget/dream.ejs ---------------------------

<div class="row">
   <div class="col l8 offset-l2 m10 offset-m1 s10 offset-s1 center-align text">
     <span id="hitokoto"><%- theme.dream.text %></span>
      <script src="https://v1.hitokoto.cn/?encode=js&select=%23hitokoto" defer></script>
   </div>
 </div>
每日诗词
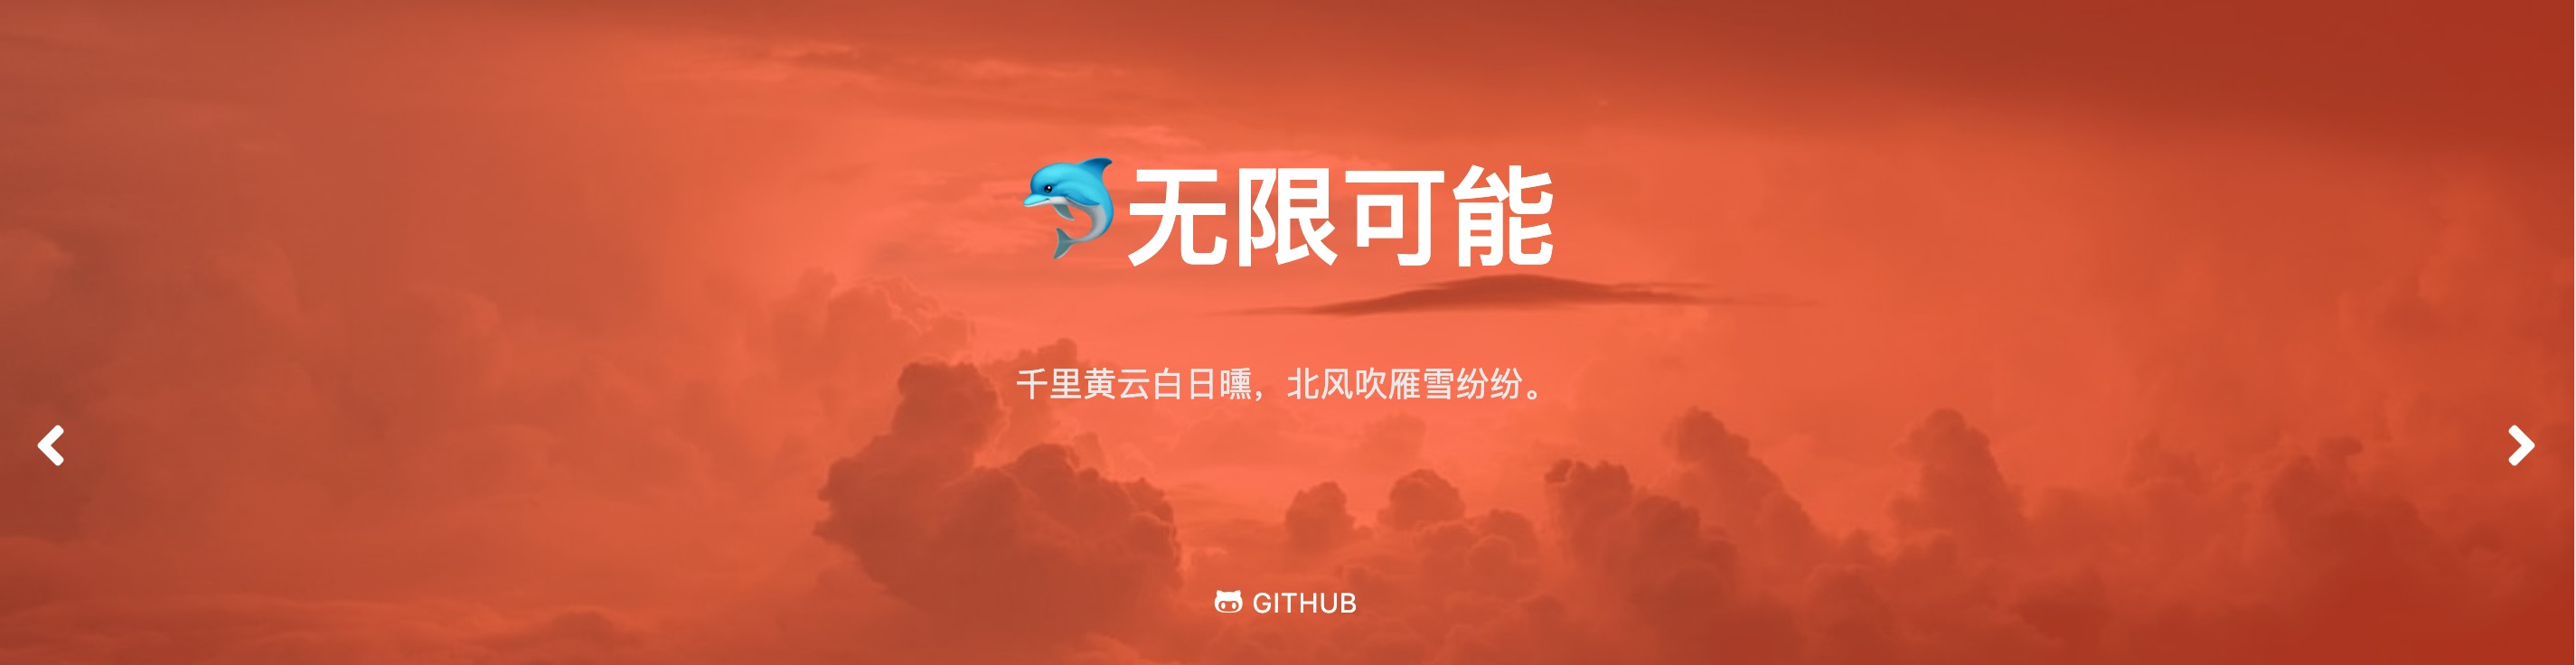
--------------------- layout/_partial/bg-cover-content.ejs ---------------------
index c7d1b7f..121716f 100755
@@ -11,18 +11,8 @@

             <div class="description center-align">
                 <% if (theme.subtitle.enable) { %>
-                <span id="subtitle"></span>
-                <script src="https://cdn.jsdelivr.net/npm/typed.js@2.0.11"></script>
-                <script>
-                    var typed = new Typed("#subtitle", {
-                        strings: ['<%= theme.subtitle.sub1 %>','<%= theme.subtitle.sub2 %>'],
-                        startDelay: <%= theme.subtitle.startDelay %>,
-                        typeSpeed: <%= theme.subtitle.typeSpeed %>,
-                        loop: <%= theme.subtitle.loop %>,
-                        backSpeed: <%= theme.subtitle.backSpeed %>,
-                        showCursor: <%= theme.subtitle.showCursor %>
-                    });
-                </script>
+     <span id="jinrishici-sentence"><%= config.description %></span>
+                  <script src="https://sdk.jinrishici.com/v2/browser/jinrishici.js" charset="utf-8"></script>
                 <% } else { %>
                 <%= config.description %>
                 <% } %>
添加文章显示作者名字
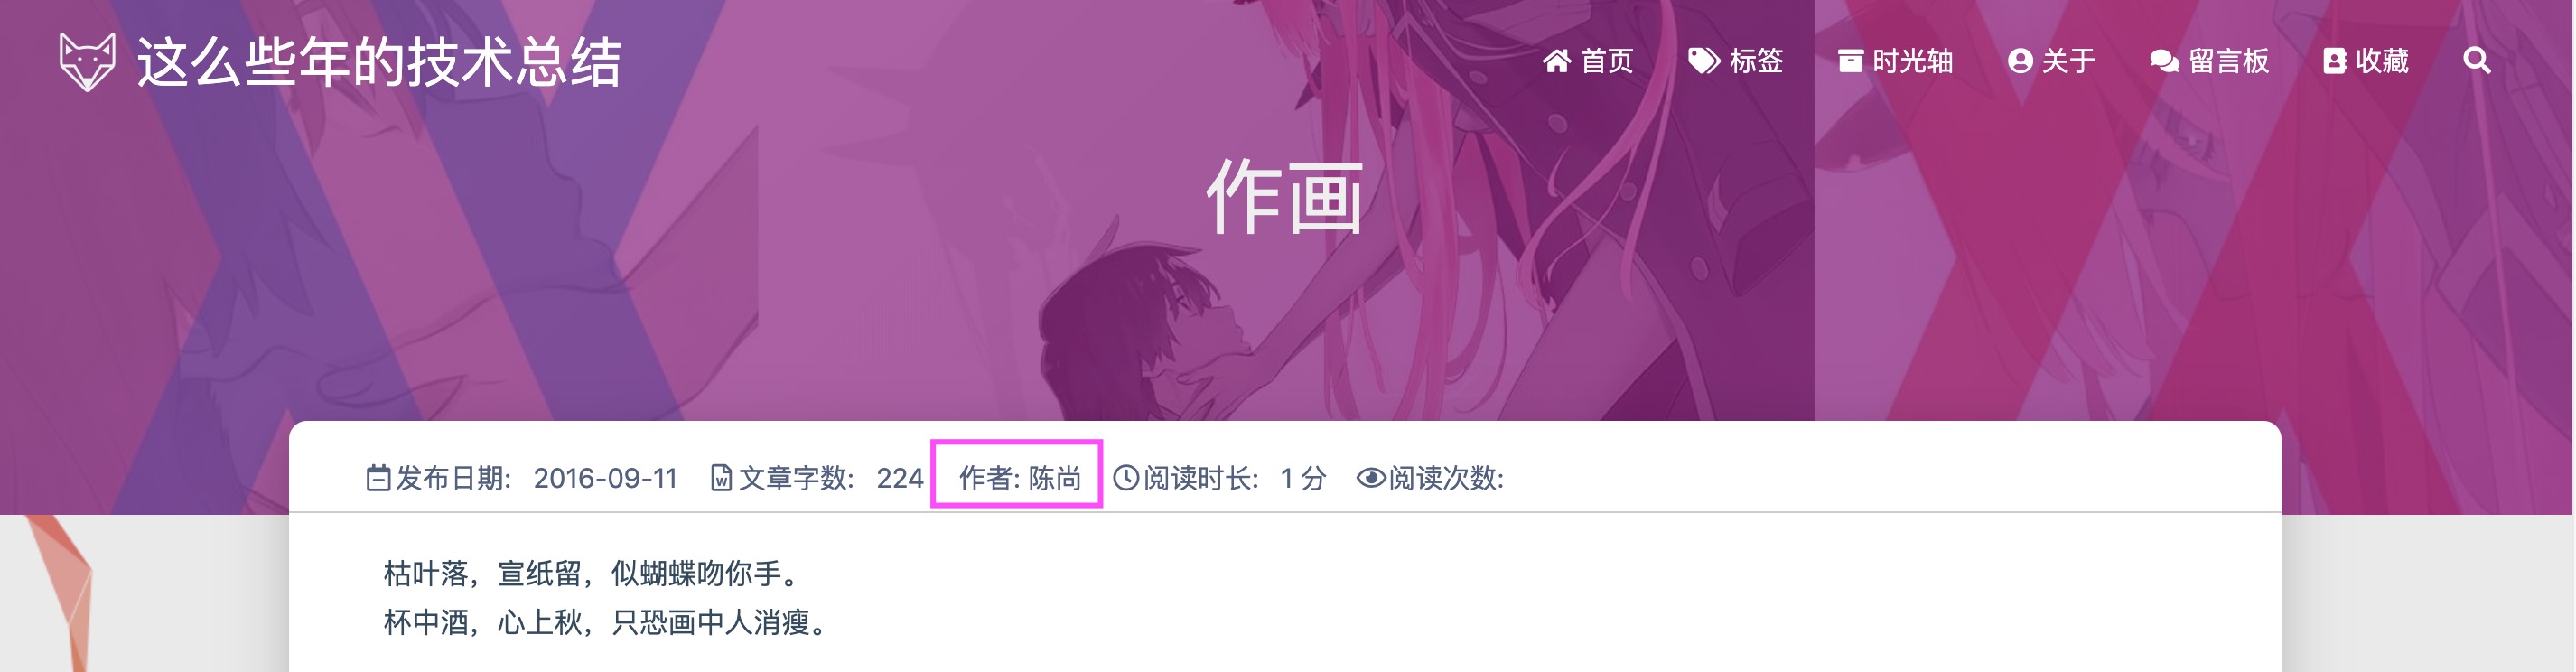
---------------------- layout/_partial/post-detail.ejs -----------------------

<div class="info-break-policy">
    <% if (page.author && page.author.length > 0) { %>
        <i class="fa fa-pencil"></i> 作者: <%- page.author %>
     <% } else { %>
    <i class="fa fa-pencil"></i> 作者: <%- config.author %>
    <% } %>
</div>
自动生成分类
hexo-enchancer 无法配置生成的目录深度,所以选择了 hexo-auto-category 使用教程参考: https://blog.eson.org/pub/e2f6e239/
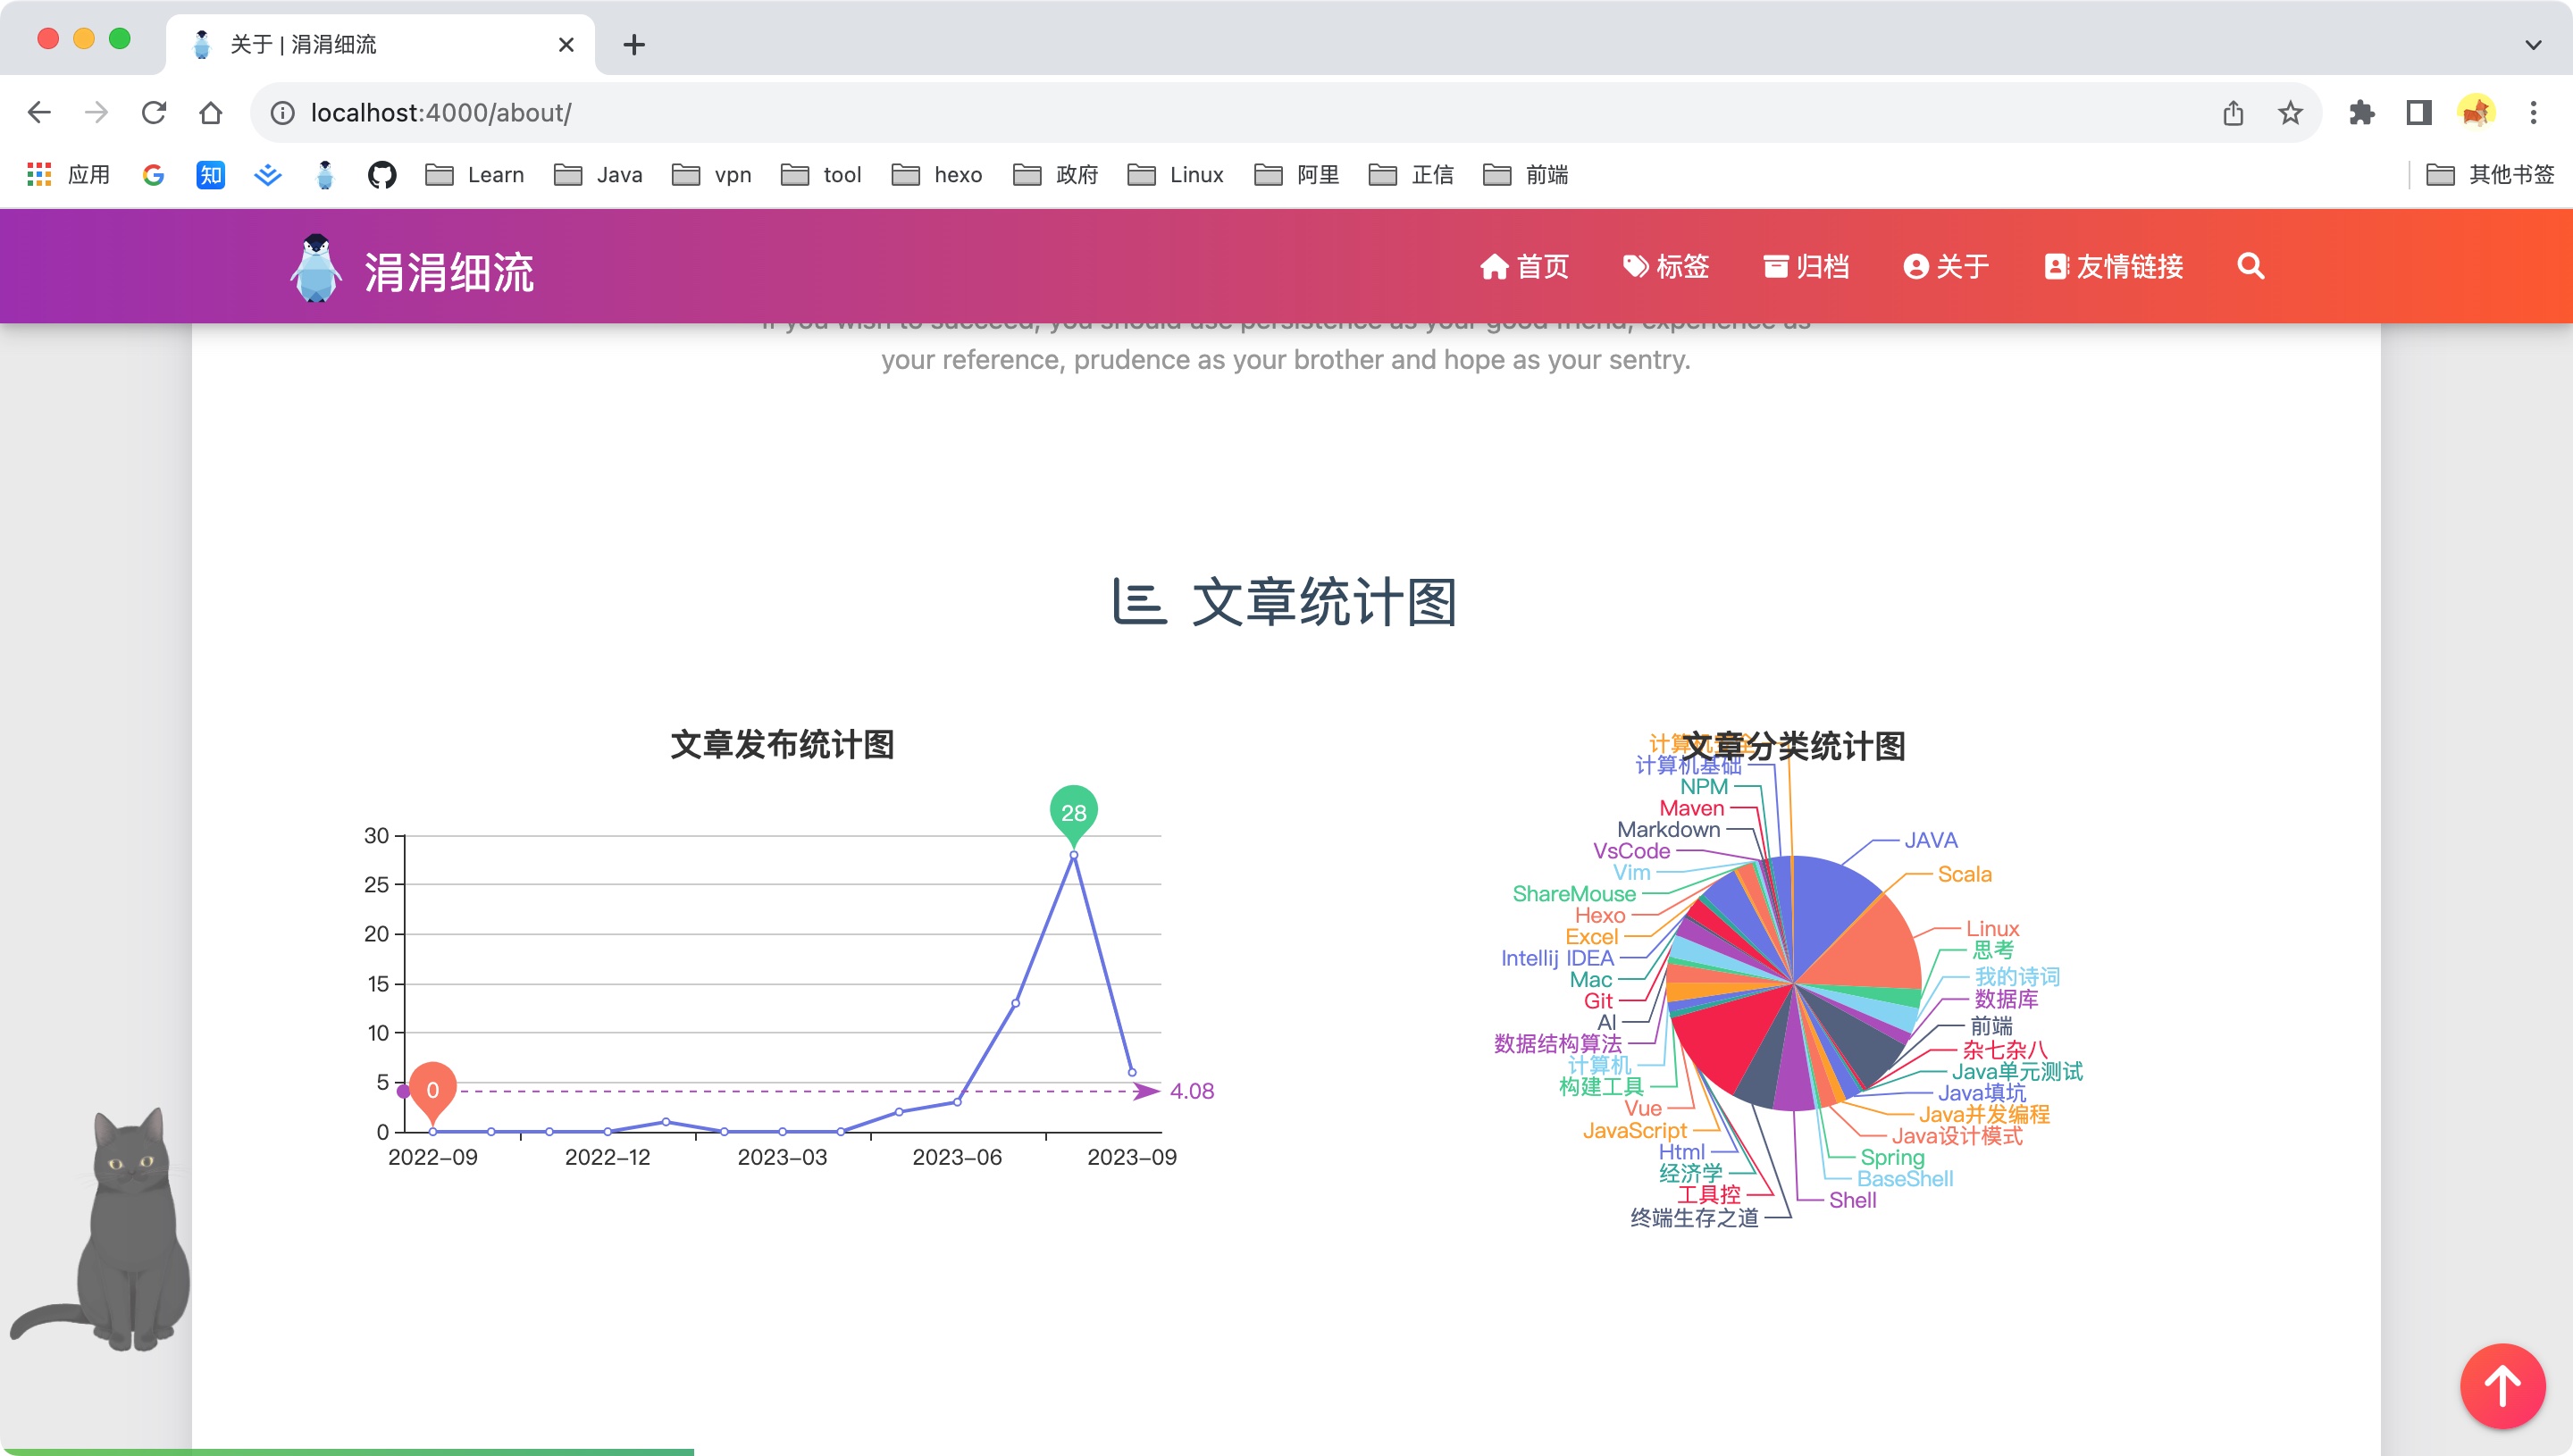
关于页面优化
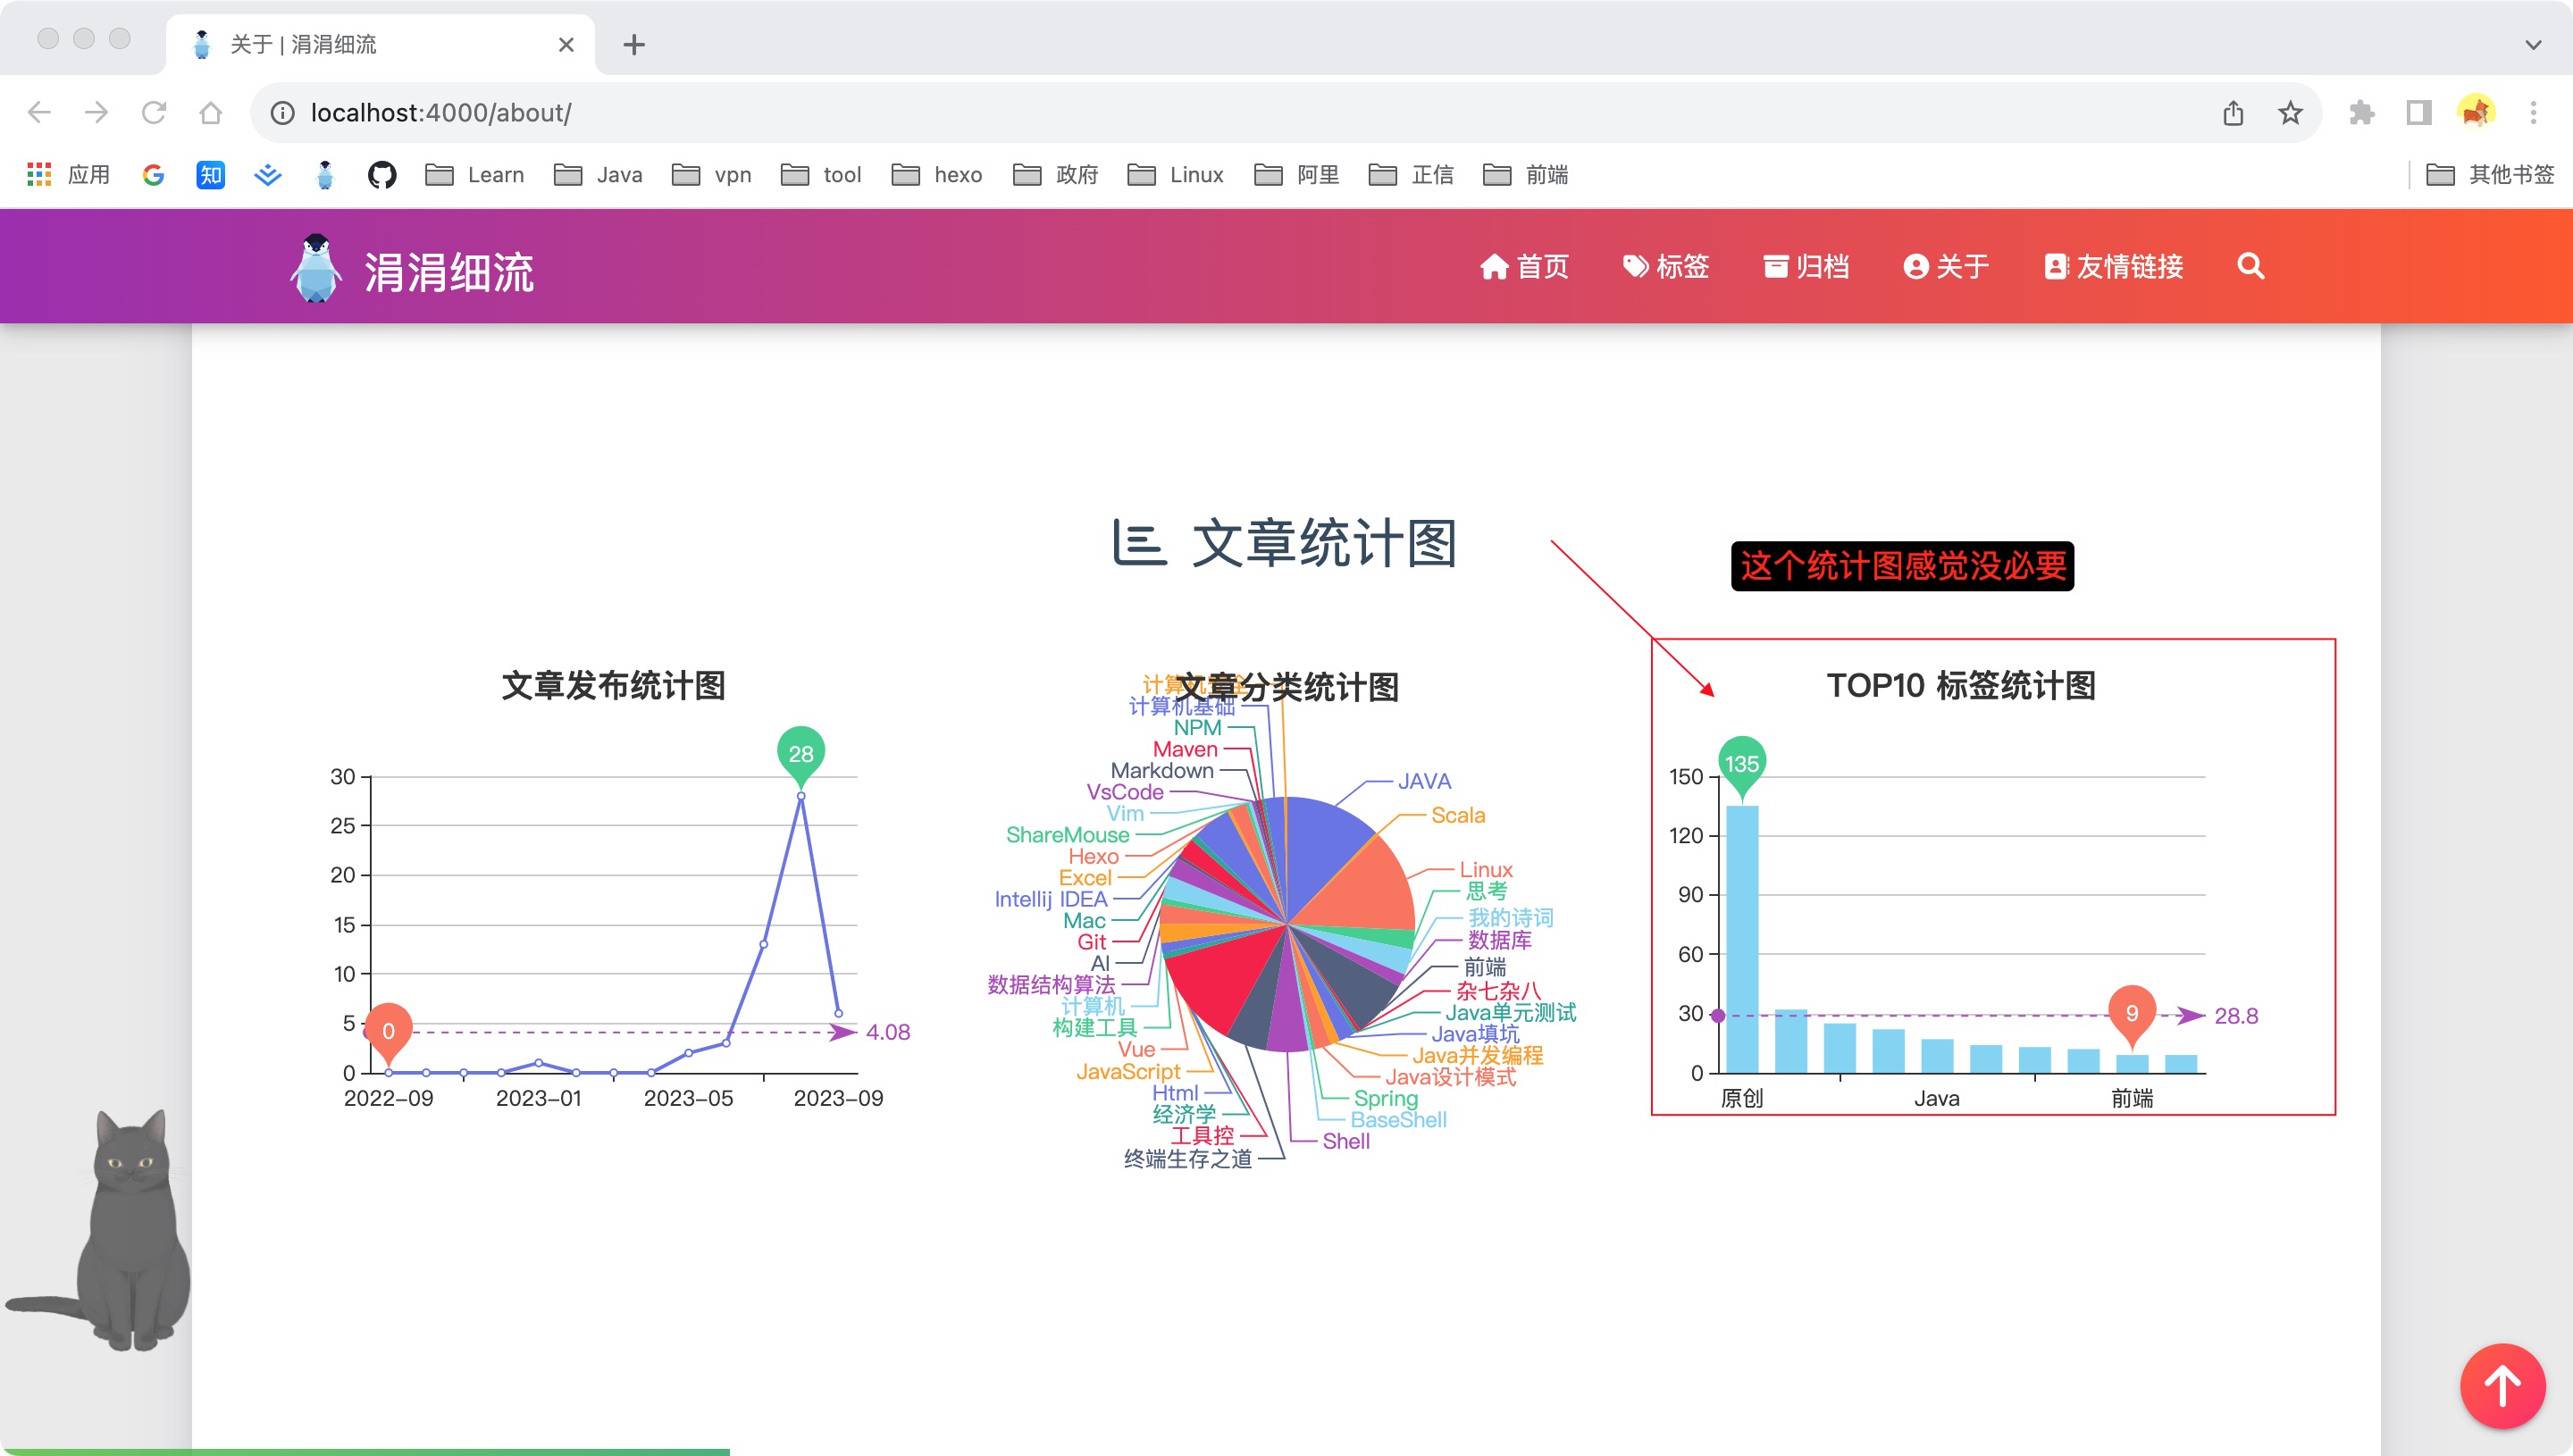
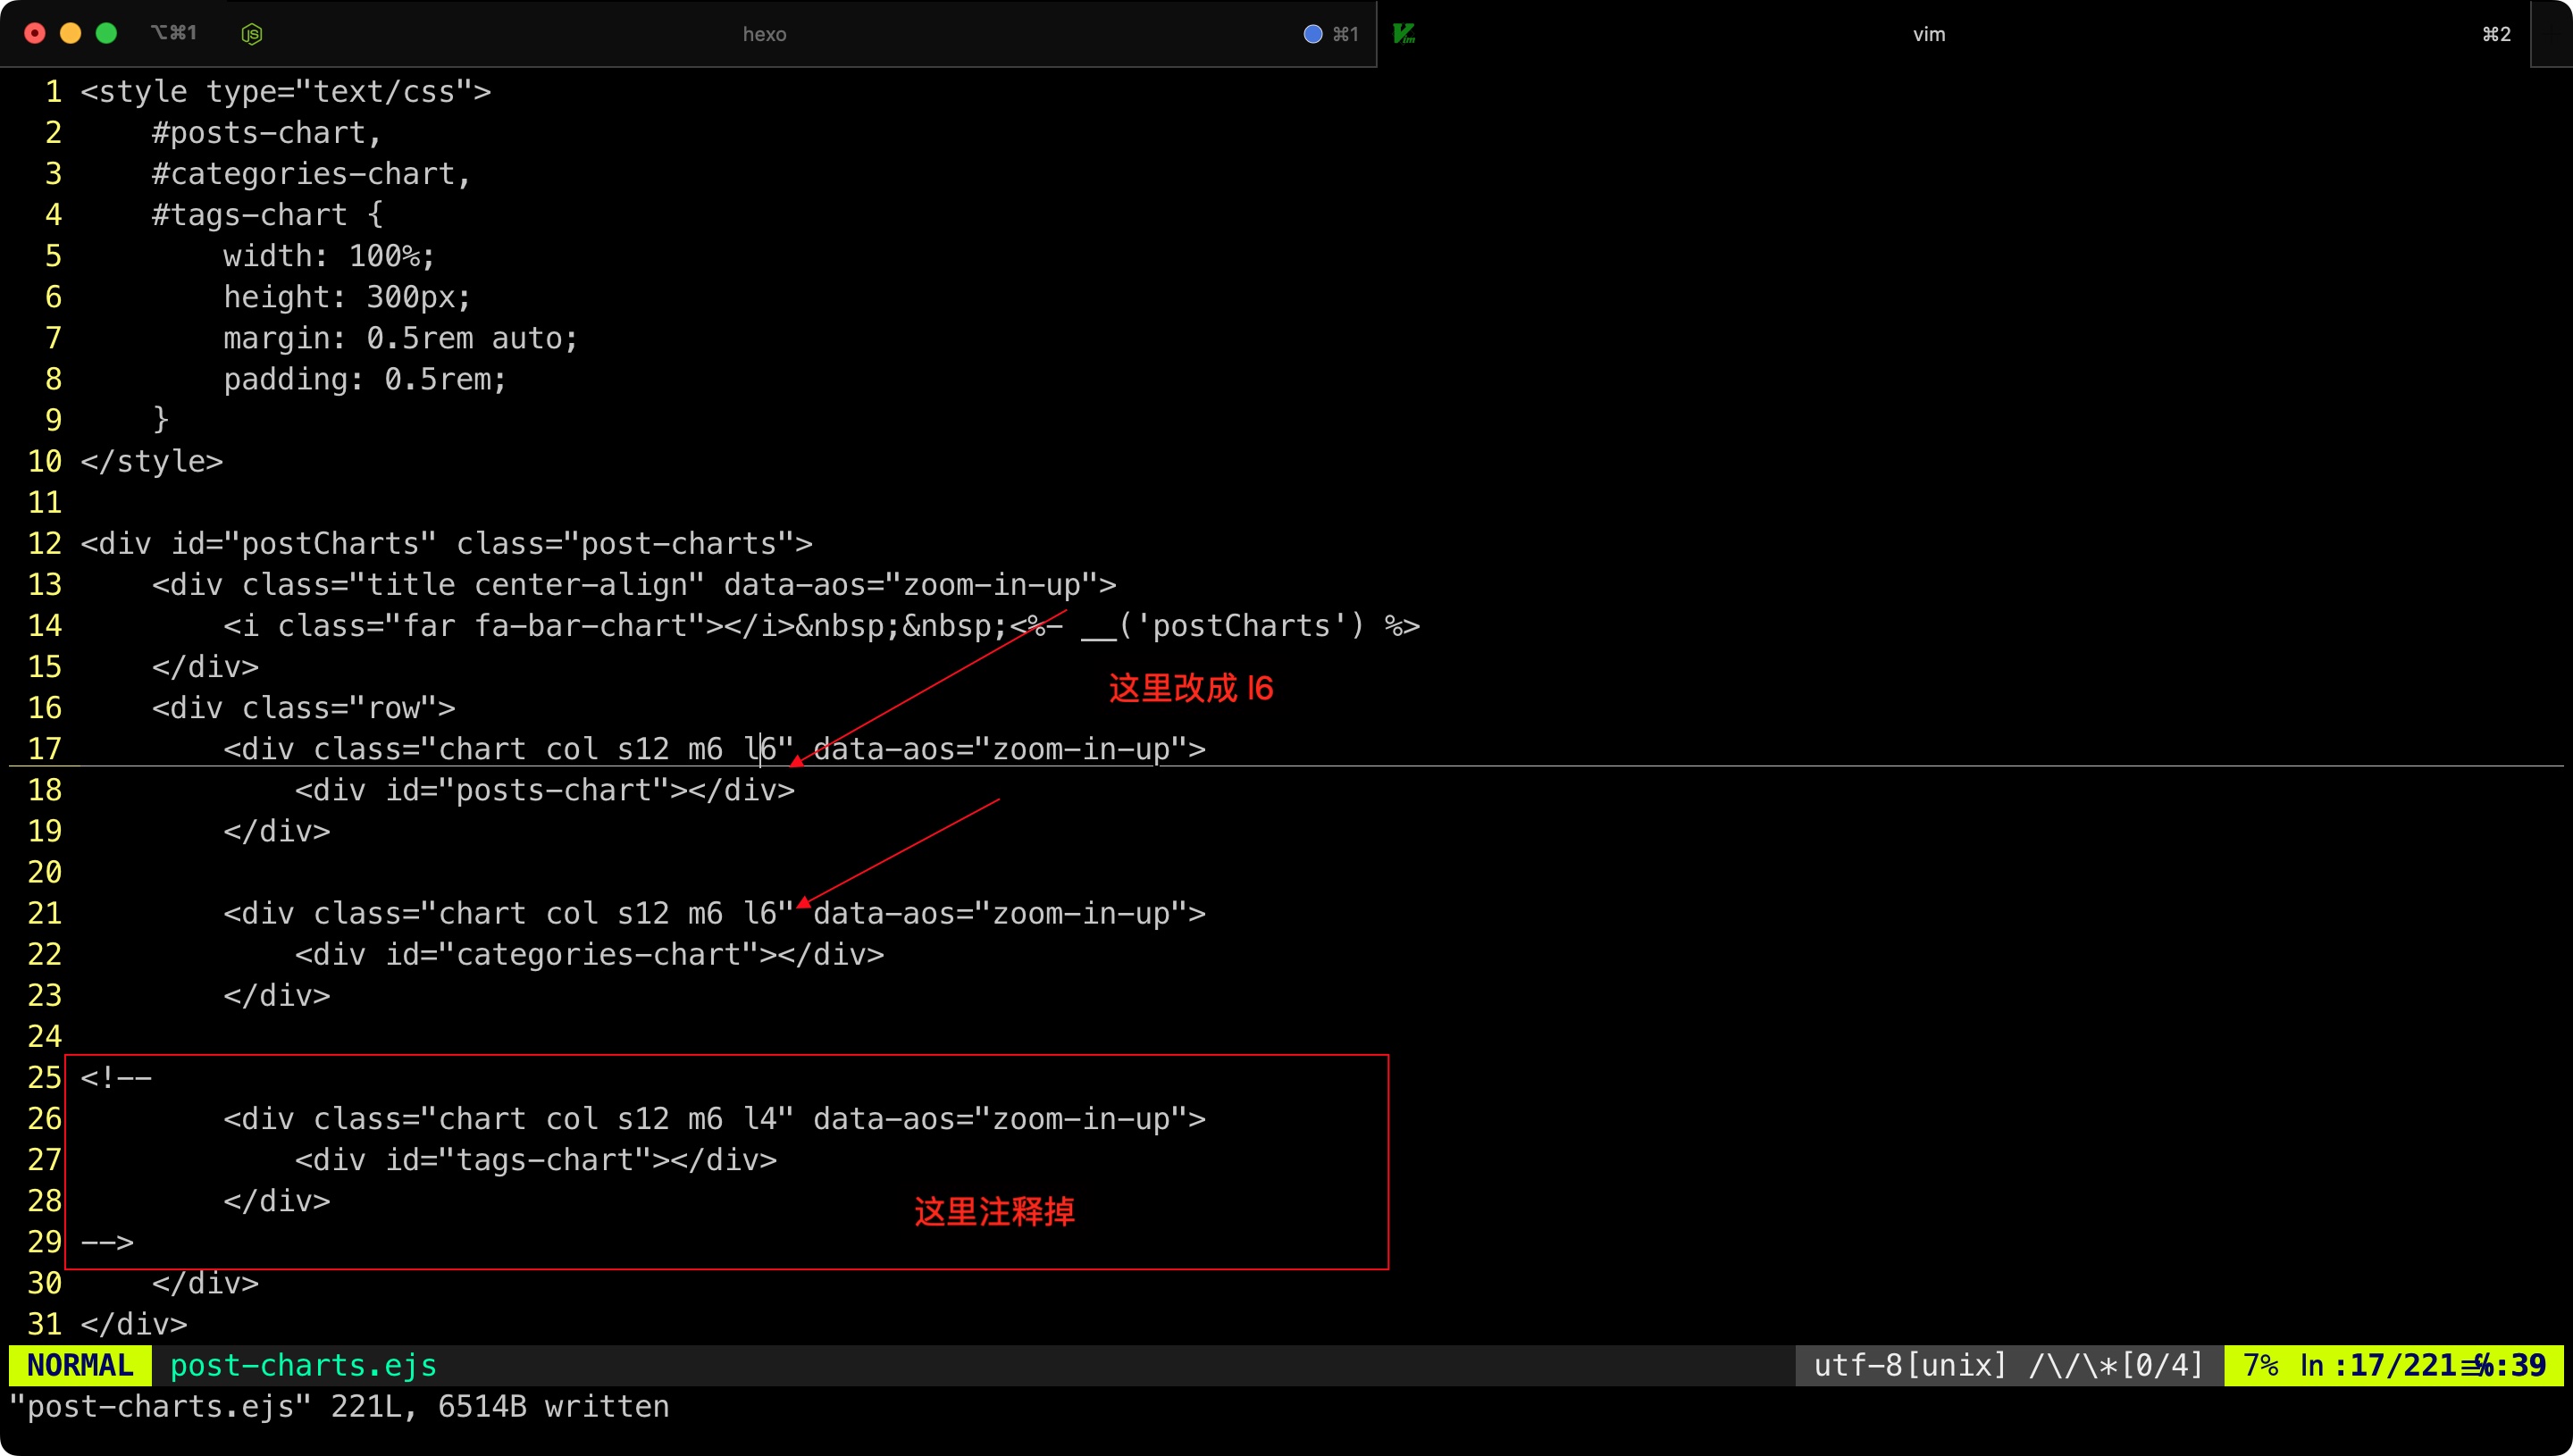
第一步: 找到 layout/_widget/post-charts.ejs

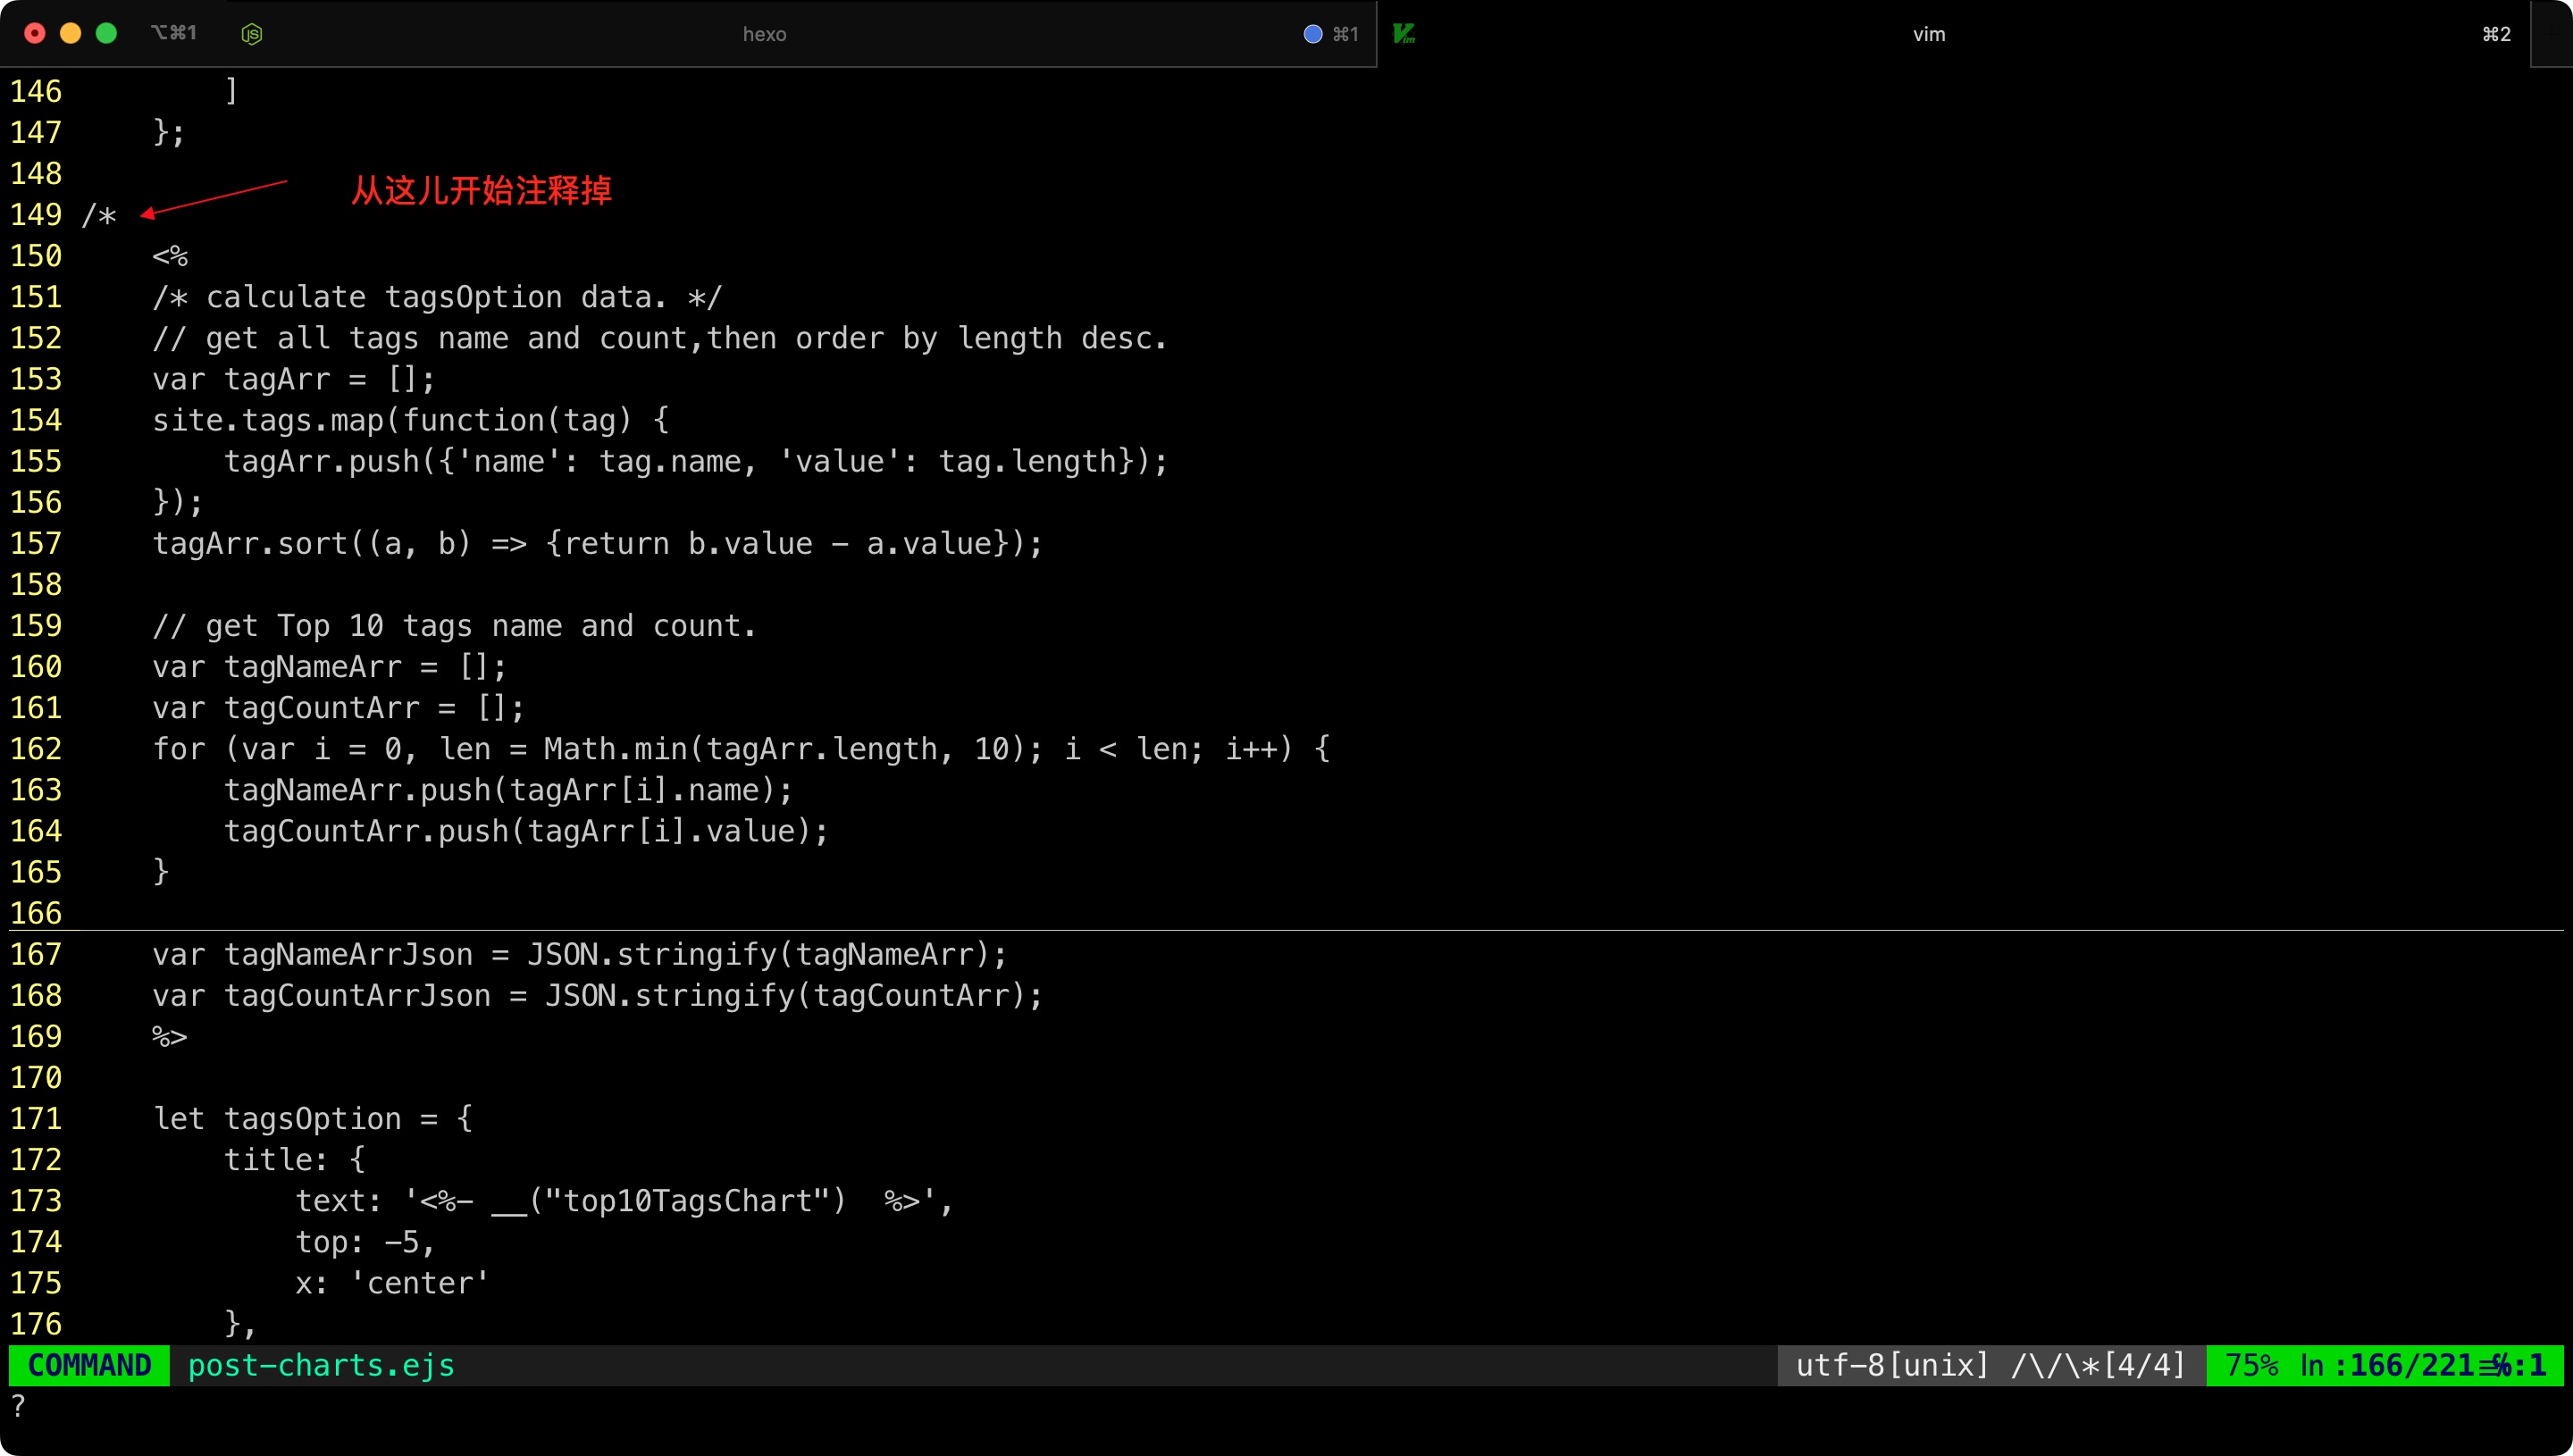
第二步:去掉 tags-chart 相关的代码
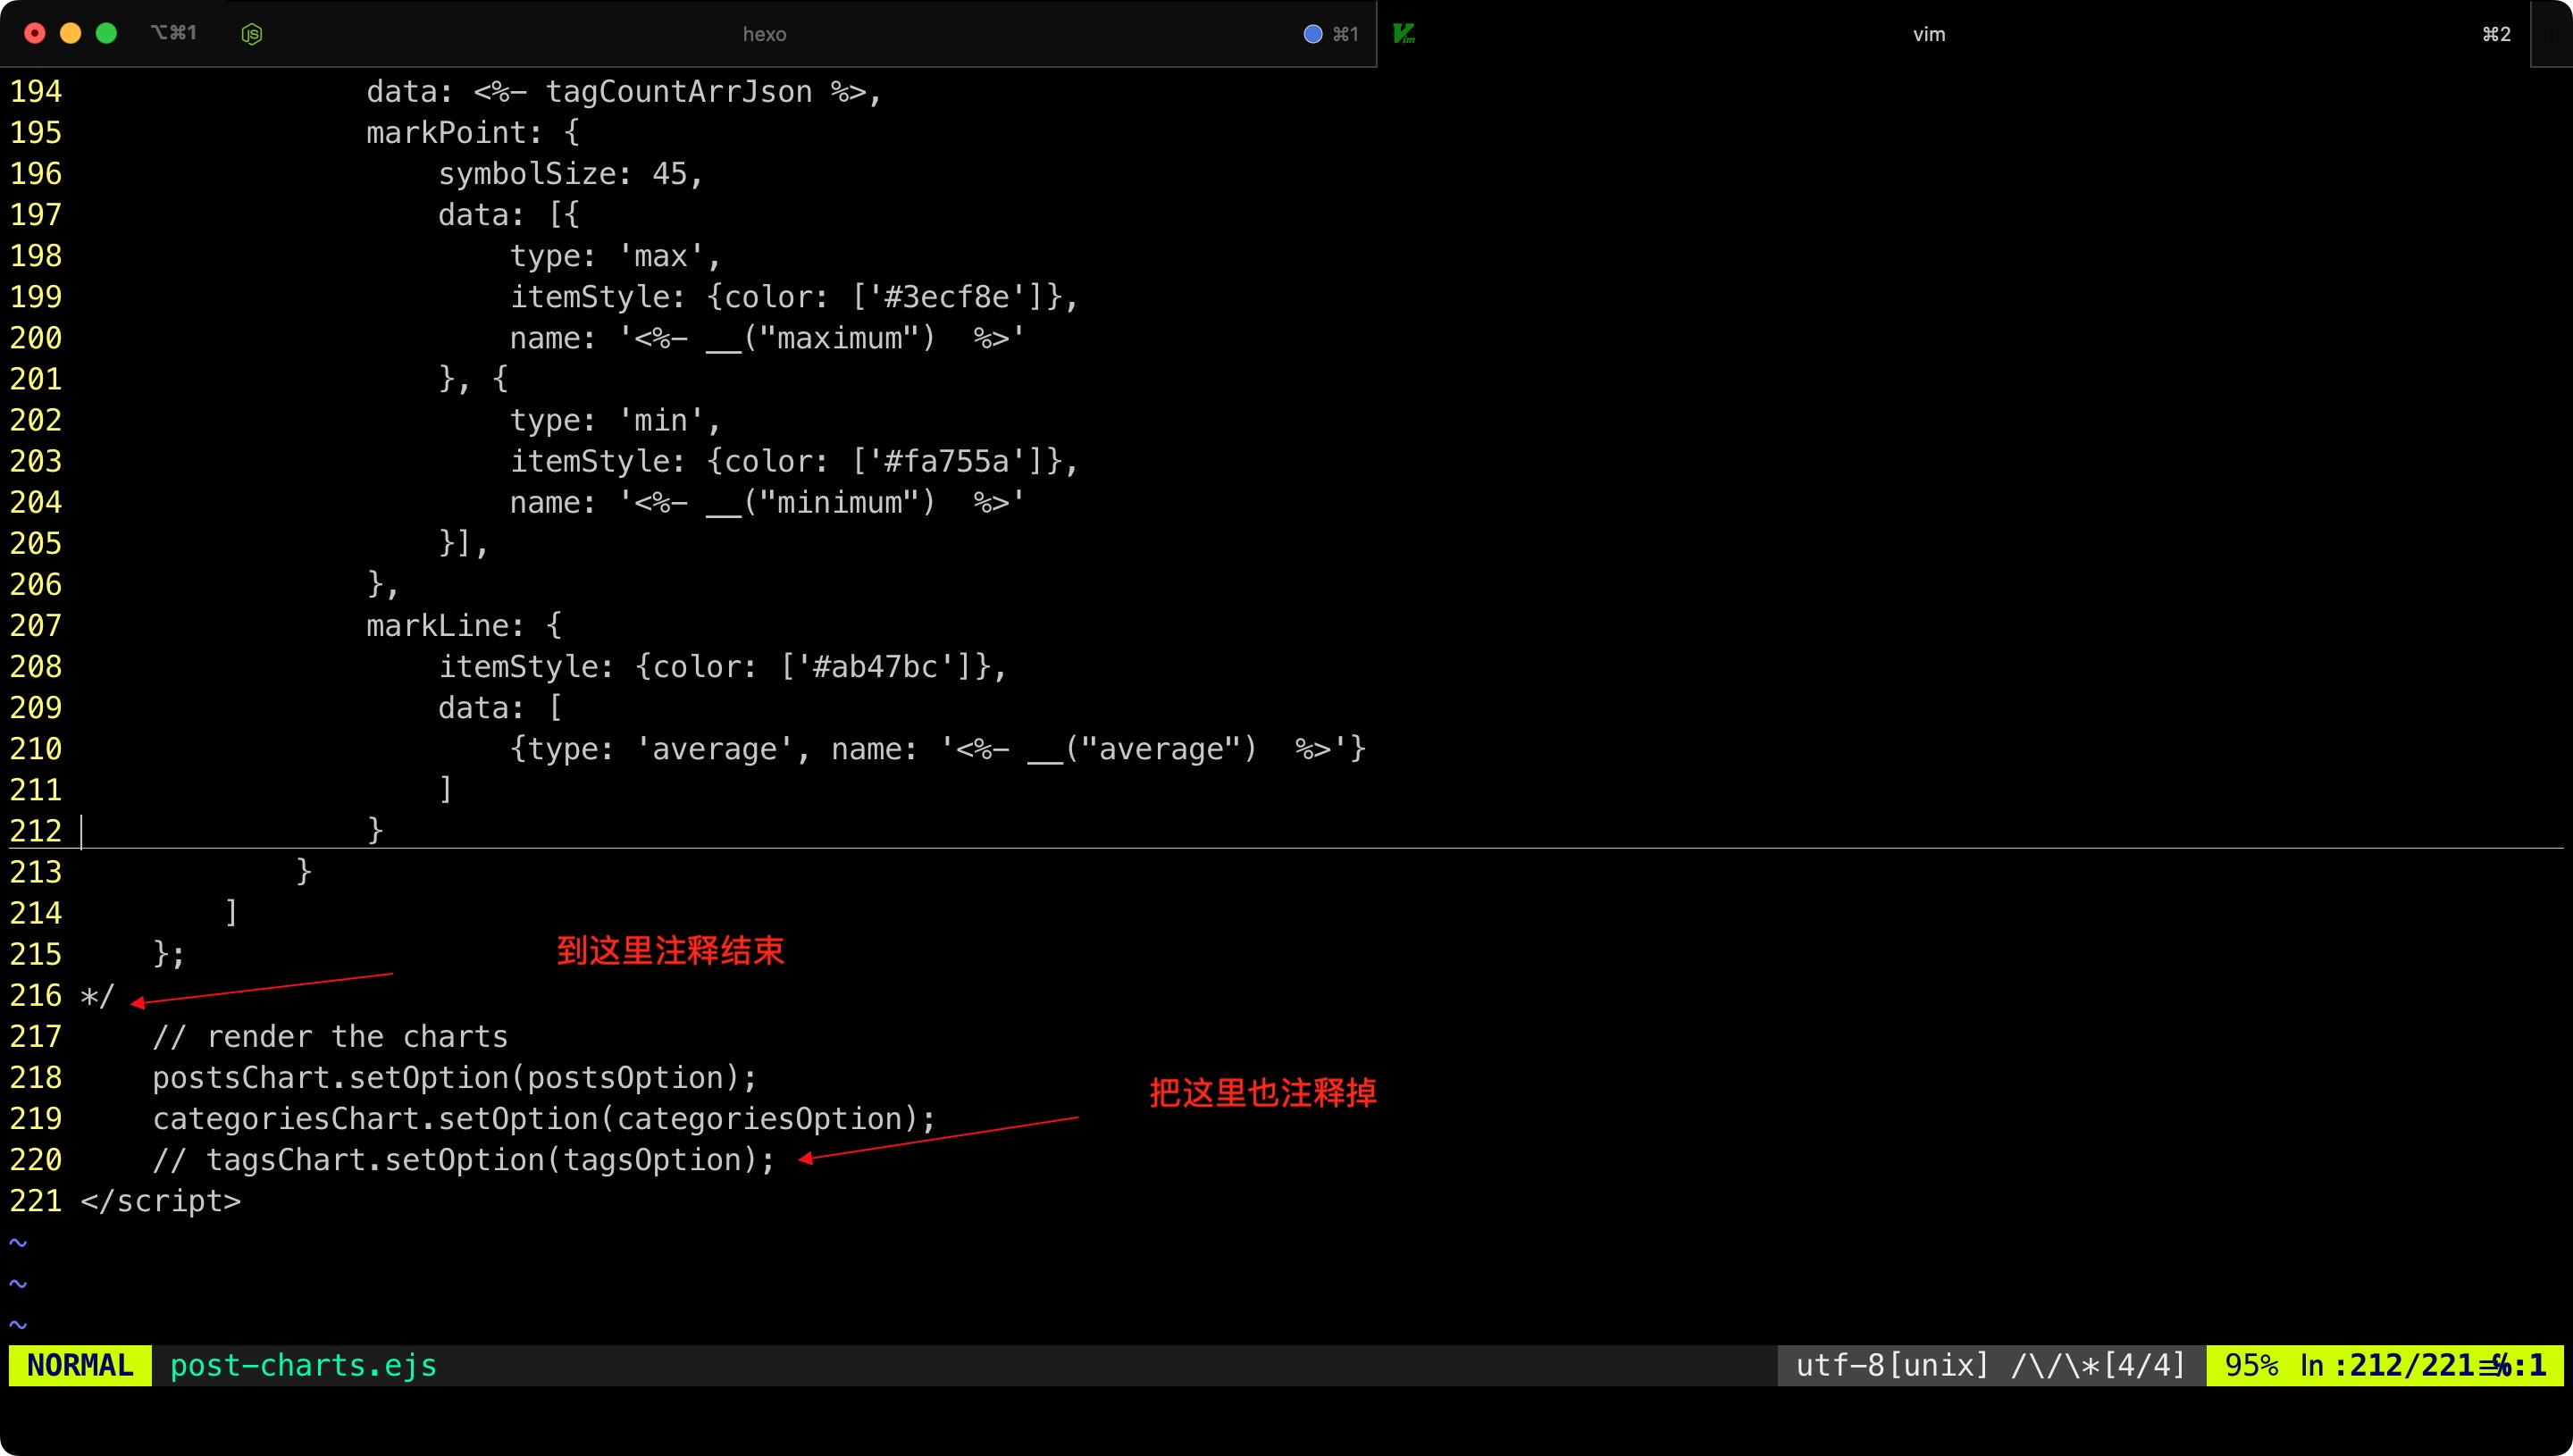
最终的效果